Run Node.js Azure Mobile Services locally
Run Node.js Azure Mobile Services locally
Want to unit test or debug your Node.js-based Azure Mobile Service? Here's how.
For spinning up new mobile apps quickly, I am really liking Azure Mobile Services. If you aren't familiar with it, it is a Backend-as-a-Service (BaaS) similar to Parse. Like other BaaS options, it does all of the hard work for handling social authentication, data storage, push notifications, and more. The Mobile Services management portal even has a built-in script editor that lets you create a complete backend including database and code completely online.
While the built-in script editor is handy for quick prototyping, anybody building a non-trivial app will quickly run up against its limitations. Most folks would prefer to develop in the editor of their choice with all of the niceties like code completion, interactive debugging, testing support, etc. While it initially only supported Node.js, Mobile Services has been updated to allow leveraging .NET using WebApi and if you chose that route, you can build your app locally using Visual Studio and take advantage of all of the benefits of local development and debugging.
However, I often still prefer to use the Node.js backend for its simple-yet-powerful approach. Unfortunately, there is no official way to run and debug locally while using the Node.js backend. But, using a little bit of ingenuity, we can solve that problem.
In general, the steps required are:
- Set up Mobile Services to use source control
- Download the infrastructure files that run your Mobile Services instance
- Set up Node.js and environment variables to mimic the Azure environment
- Install SQL Server Native Client and modify connection strings
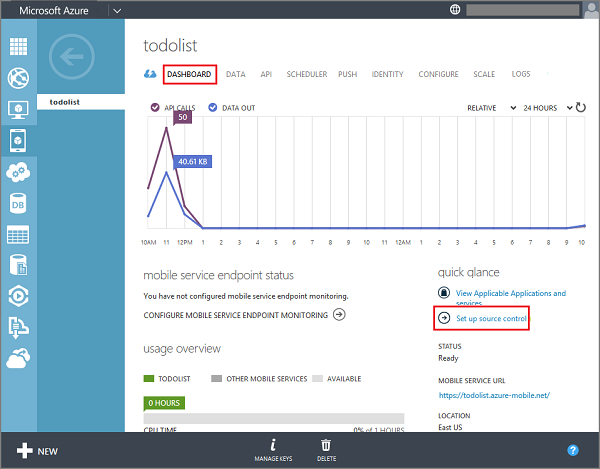
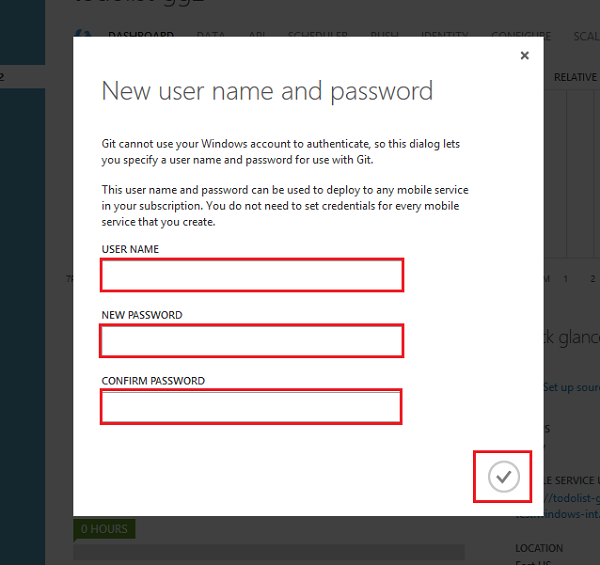
Set up Mobile Services to use source control
Even if you don't plan to use source control (but really, why wouldn't you?), you still need to enable source control for your Mobile Service. There are lot of guides on how to do this but here are some pictures to make it clear:
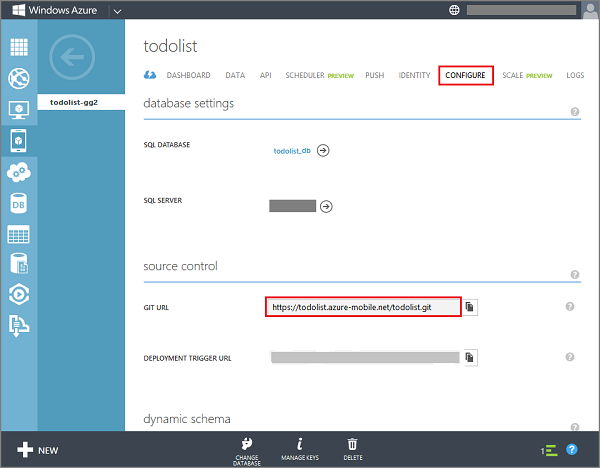
Once you have enabled Git on your Mobile Service, go ahead and clone the repository to your local machine:
git clone <your-git-url>
Don't worry too much about where you cloned it to because we will need to move the repository in a later step.
Download Mobile Services infrastructure files
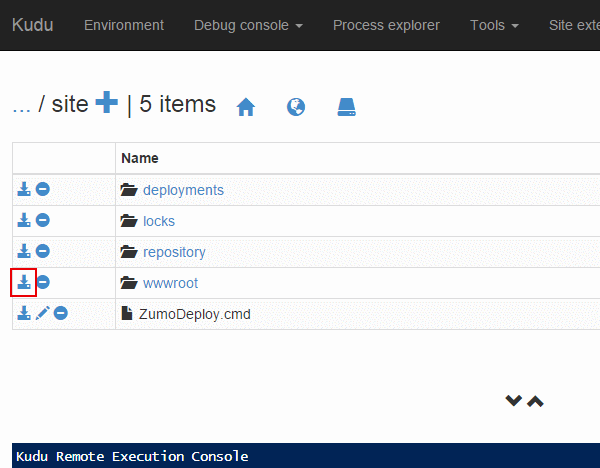
Behind the scenes, a Mobile Service is just a special type of Azure Website. As such, you can use the Kudu tools to inspect and interact with your site. To access your Kudu control panel, navigate to:
https://your-mobile-services-site.scm.azure-mobile.net
There is a lot of neat tools provided there so I recommend you poke around a bit. But for now, we are interested in the Debug Console. (I use the Powershell version, but it doesn't really matter for this task.) When you enter the Debug Console, you will also see a directory/file listing. Click the site folder and then click the little download icon next to wwwroot. This will download a .zip file of your entire Mobile Service, including both your user-authored code as well as all of the Node modules and supporting files.
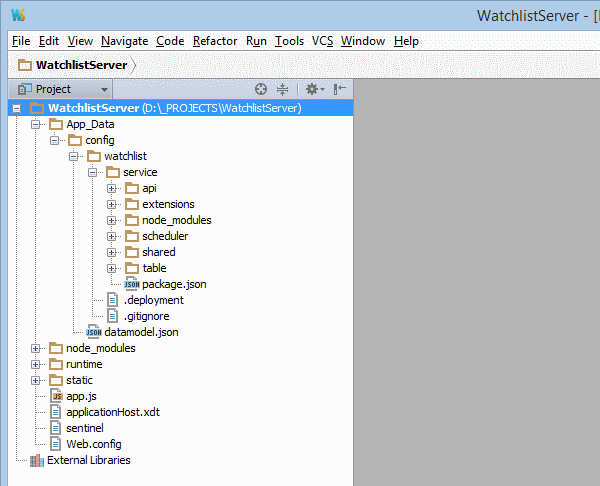
Unzip the downloaded wwwroot files to your preferred location. Now we want to integrate the cloned repository into the wwwroot files, however; the wwwroot folder contains your user code in a the App_Data\config\scripts but the cloned repository code lives in (your_repository)\service. Go ahead and delete the entire scripts folder from App_Data\config and then copy your cloned repository into the config folder. Open up runtime\core.js and find the getScriptsDirName() function and modify it to return the new path:
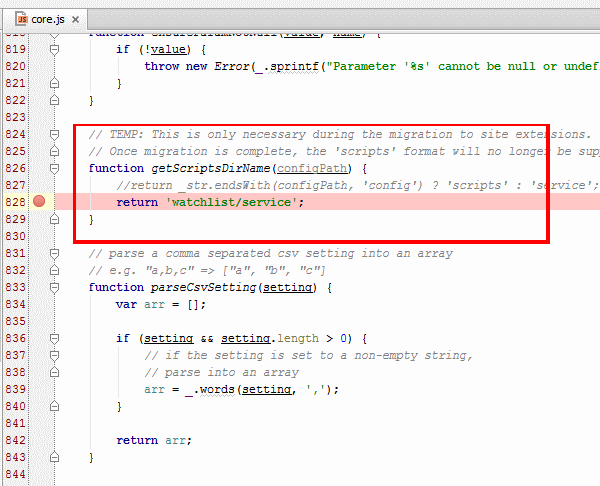
Now any changes to your local repository will also appear at the correct location inside of the wwwroot folder. (If you were using any custom Node modules that were part of your user files, make sure to run npm install again after deleting the scripts folder and replacing it with your cloned repository folder.)
Set up Node.js and environment variables to mimic the Azure environment
Back in the Kudu control panel, click on Environment. You can see a lot of information here, but two important bits are:
64 bit process: False
and:
WEBSITE_NODE_DEFAULT_VERSION = 0.8.28
This tells you that your Mobile Service is running on a 32-bit (x86) architecture and is running Node.js version 0.8.28. If you don't already have Node installed, you should install this same version, which you can download for your OS from here. If you already have a later version of Node installed, it may work but you will encounter issues with some of the referenced modules. (I did try to use 0.10.36 but after struggling with npm dependencies for an hour, I decided it was not worth the effort).
A note about x64: I originally tried to get this running using 64-bit Node but ran into a few hurdles. First, you will need a 64-bit version of the
msnodesqlmodule. You can either compile it yourself (which requires Python and C++ and looks like a pain) or try thenode-sqlserver-unofficialpre-compiled binaries. I tried the later but no matter what I did, i just kept gettingError: [Microsoft][ODBC Driver Manager] Data source name not found and no default driver specified (SqlState: IM002, Code: 0)If you can get the SQL dependency sorted out, you will also need to update the
tripwiremodule to use a 64-bit version as well. At that point, it might run, but keep in mind that farther you veer from an identical Azure environment, the more likely you will be to introduce subtle issues.
Now you have the source code downloaded and Node installed, but you aren't quite done yet. In order to get a debugging environment set up, you need to make sure all of those environment variables are also set up. These instructions are for WebStorm but your editor of choice probably has a similar set of steps.
Set app.js to be the starting point for the Node server. In the Environment Variables section, you need to input all of the Environment Variables as listed in the Kudu control panel. You definitely don't want to retype all of that, but you wont have to. From the Kudu main page, click App Settings and it will dump all of the values out in JSON format. Copy the whole block and head over to JsBeautifier, paste it in, and 'beautify' it. Now, paste the formatted JSON into your favorite text editor for some find-and-replace fun. For instance, WebStorm wants the values in the format:
Name=Value
So to get your JSON into that format:
- Delete the opening and closing { }
- Remove the beginning spaces and quotation mark
- Remove the trailing quotation mark and comma
- Replace the separating spaces and colon with an equal sign
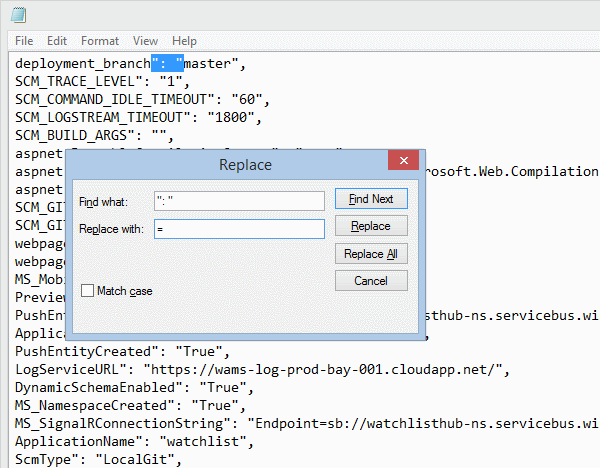
After the find-and-replace, copy the whole block of text and paste it back into WebStorm's Environment Variables configuration section.

There are two more environment variables that you need to set manually:
HOME=<full-path-to-your-wwwroot>
PORT=55555
(The PORT can be whatever port you want that won't conflict with any other services you already have running.)
At this point, you should be able to start and run the local server. However, any data-access logic will most likely fail until we set up the SQL Server Native Client.
Install SQL Server Native Client and modify connection string
In order to connect to the underlying Azure SQL Server database, you need to have the SQL Server Native Client installed. To see if you already have it installed, open the ODBC Data Source Administrator from Control Panel (make sure you open the 32-bit version if applicable). If you have it installed, it will show up on the Drivers tab:
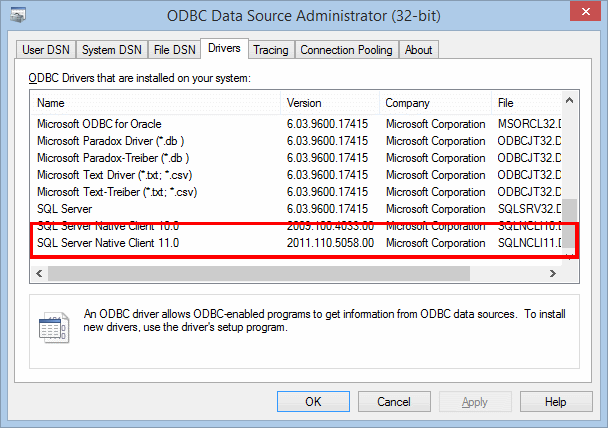
If you don't have it, you can get it as part of the SQL Server Feature Pack or here is a direct link. This installs version 11.0 and Azure Mobile Service actually uses version 10.0, but it works fine with version 11.0 as well. You will have to update your connection strings though: simply open up your Environment Variables and update the version number for the following two entries:
MS_SqlConnectionString": "Driver={SQL Server Native Client 10.0};Server=...
UserConnectionString": "Driver={SQL Server Native Client 10.0};Server=...
Now when you run your local instance, any of your data-access logic should be able to talk to the remote Azure SQL Server as well. Keep that in mind when you are debugging/testing - you are communicating with and modifying the live database. Of course, you could update your connection strings to point to a local/test database, but that is outside of the scope of this article.
Caveats
Even though your Mobile Service is now running locally, keep in mind that there might be a few things that do not work the same as in production. Social authentication (via Facebook, Twitter, etc) will likely not work since you need to register specific urls with those services (and they will not be able to contact your localhost instance). Push notifications via the Notification Hubs may not work (though there is probably a work-around via changing some environment variables). That said, the point it not to stand up a fully functional replacement but instead to allow you to write unit tests and debug your code locally instead of relying on console.log output and the inefficient change-commit-test-repeat cycle.
In the end, this seems like a lot of work to get things set up, but after having done it once, it really isn't too hard and the benefits are definitely worth it. Shoot me a message on Twitter if you try this approach and let me know how it goes.