Build an Alexa skill using Azure Functions
Build an Alexa skill using Azure Functions
Although AWS Lambdas are the default, it is dead simple to use Azure Functions for your Alexa skill as well
I have an Amazon Echo Dot and really enjoy it. I love speaking out to the ether and getting a (sometimes questionable) response back like magic. And with the Alexa Skills Kit, it is super easy to extend the functionality of what Alexa can do.
I live on an island that is serviced by a ferry, so the very first skill I wrote was called Ferry Godmother and let me ask when the next sailing was along with other useful ferry information. By default, Alexa skills are built on AWS Lambdas and it was super easy to whip up a little Node.js script to provide the ferry skill data. Check it out in action below:
But lately I have had a bit of a crush on Azure Functions. From quickly standing up serverless APIs, to providing the 'glue' to Azure Logic Apps, they really are easy to set up and use. Like AWS Lambdas, Azure Functions let you use a variety of languages (Lambdas currently support JavaScript, Python, Java, C#, and Go, while Azure Functions support C#, JavaScript, F#, and Java (v2 Preview)), so I decided to write a new Alexa skill using C# and Azure Functions.
Creating the Azure Function
For this example, we will build a simple Alexa calculator. Although you can create and code your function directly in the Azure Portal, I am gonna use Visual Studio instead because it:
- allows me to use my normal source control workflows
- will deploy the pre-compiled code for faster cold start-up
- is just plain nice!
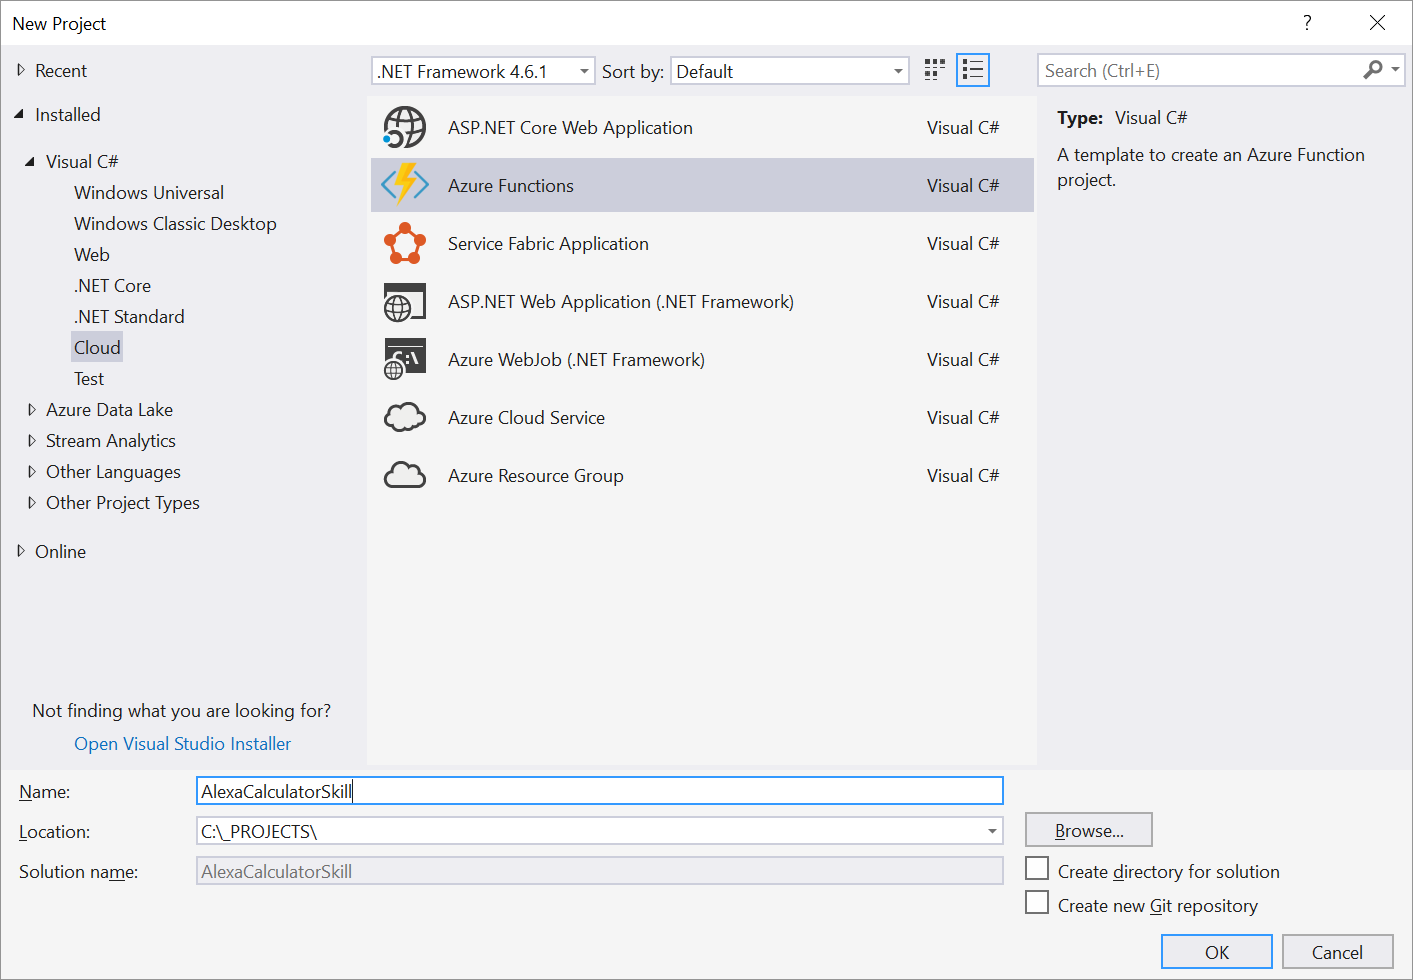
So File > New and create a new Azure Functions project:
Visual Studio will create your new project:
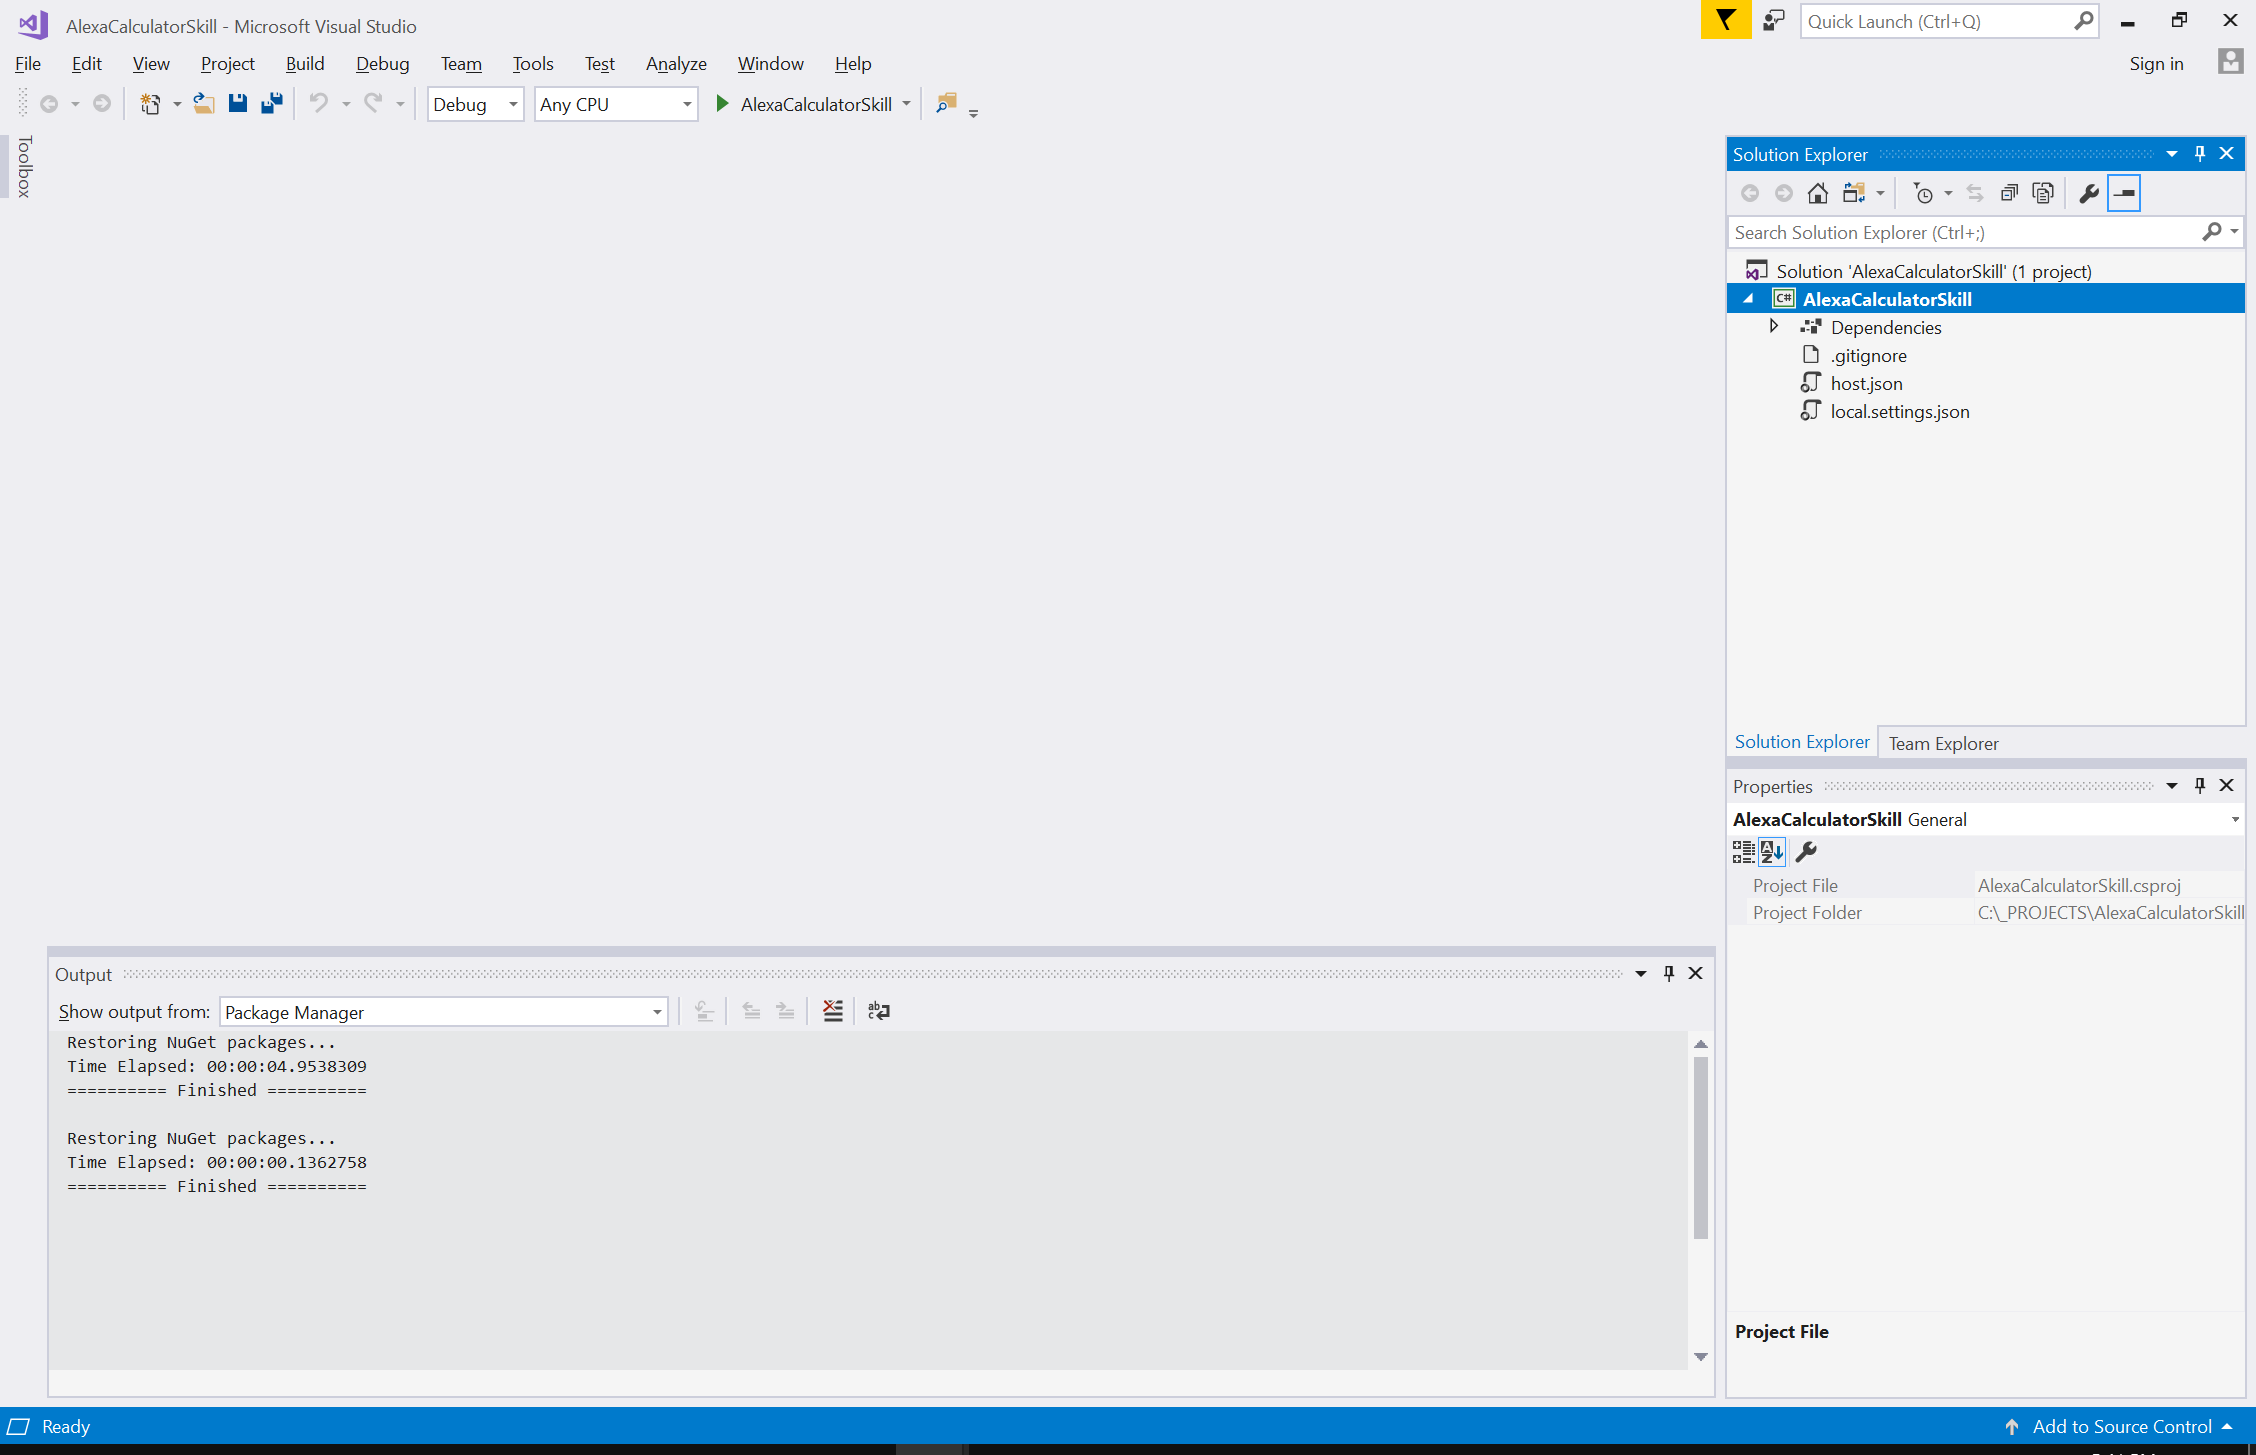
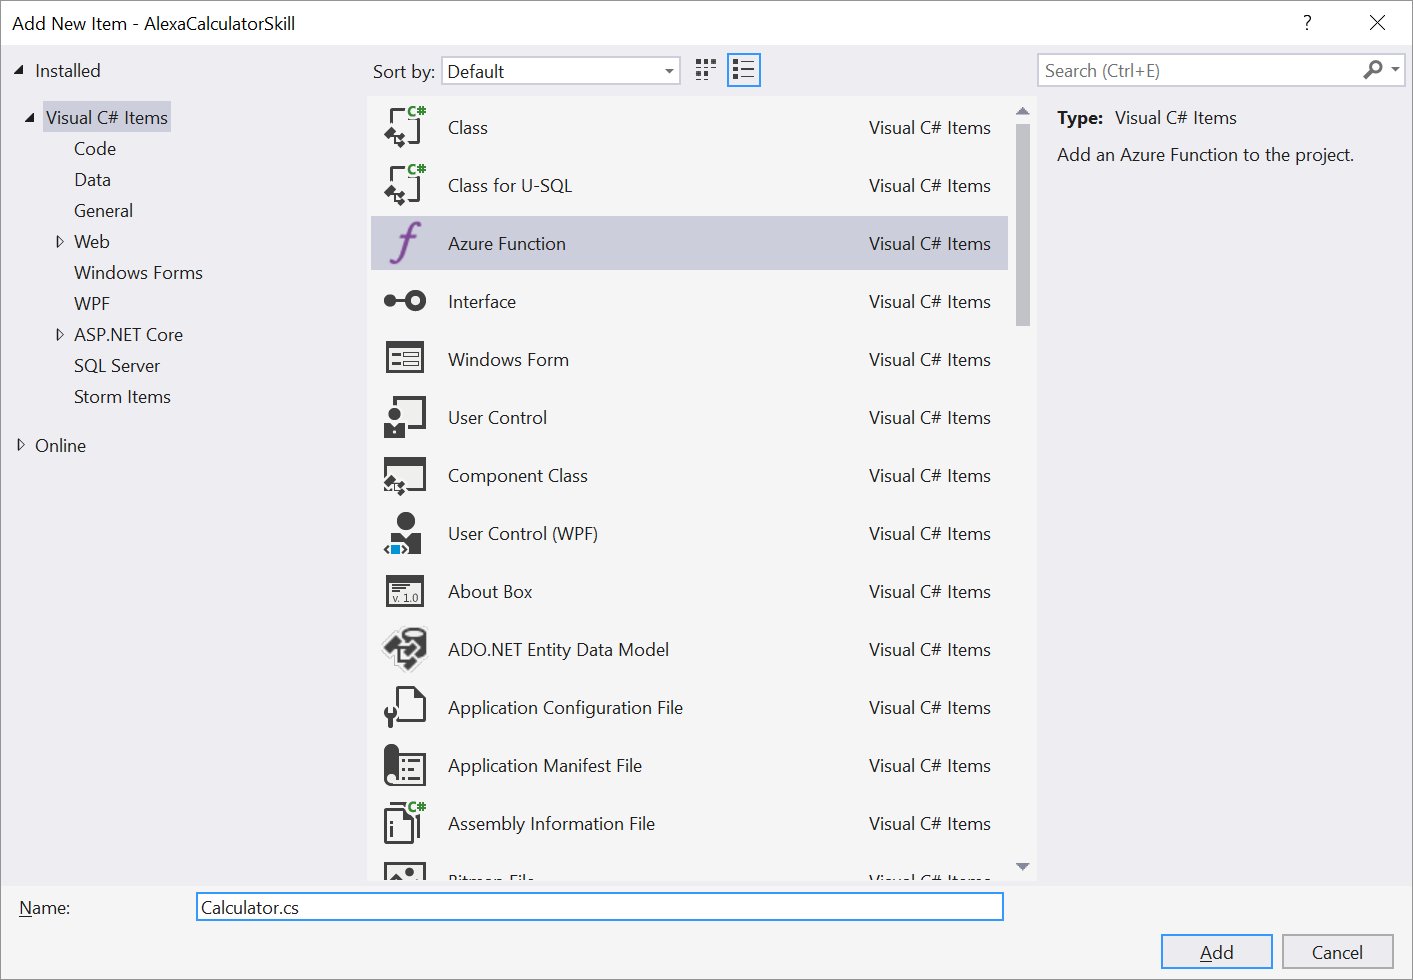
But this project is essentially empty, so we need to add a function handler to it. Add > New Item and add a new Azure Function class:
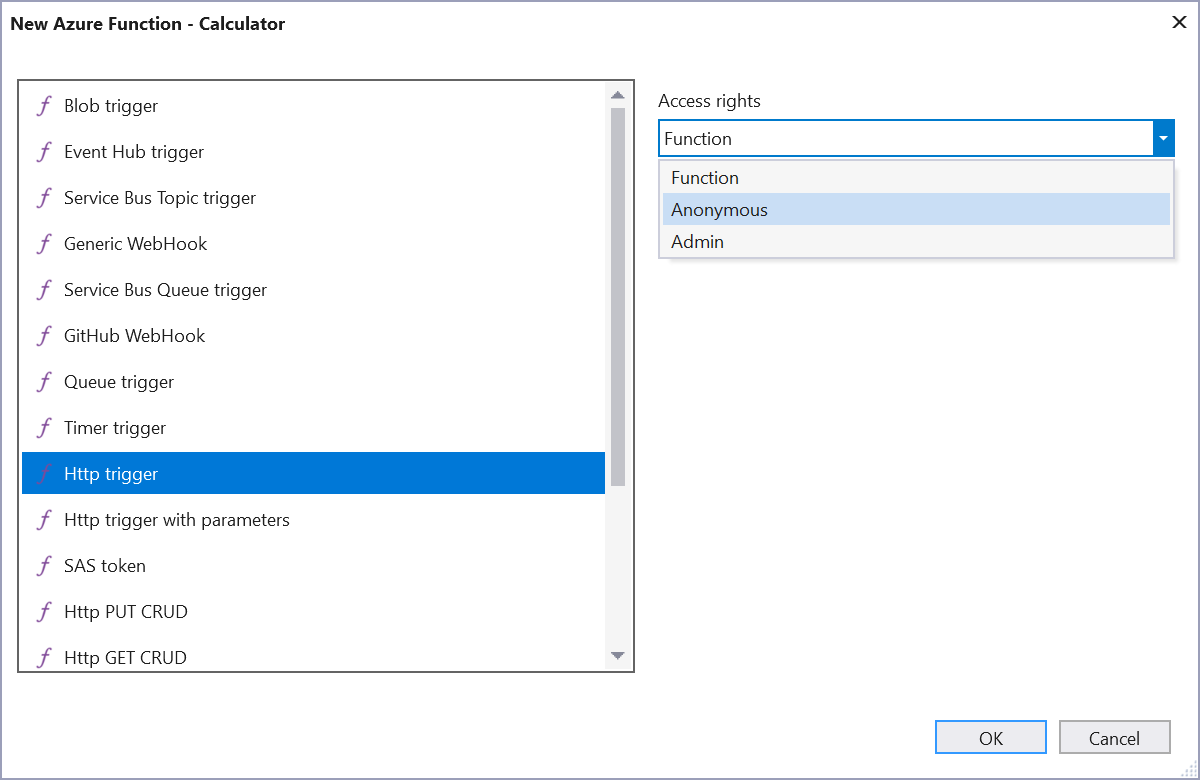
VS will prompt you for what kind of event you want to trigger your function. Since Alexa uses plain old HTTP/S, choose Http Trigger. Make sure to set the Access Rights to Anonymous so that Alexa will be allowed to call your function:
Your new HttpTrigger function will be created with some boilerplate code:
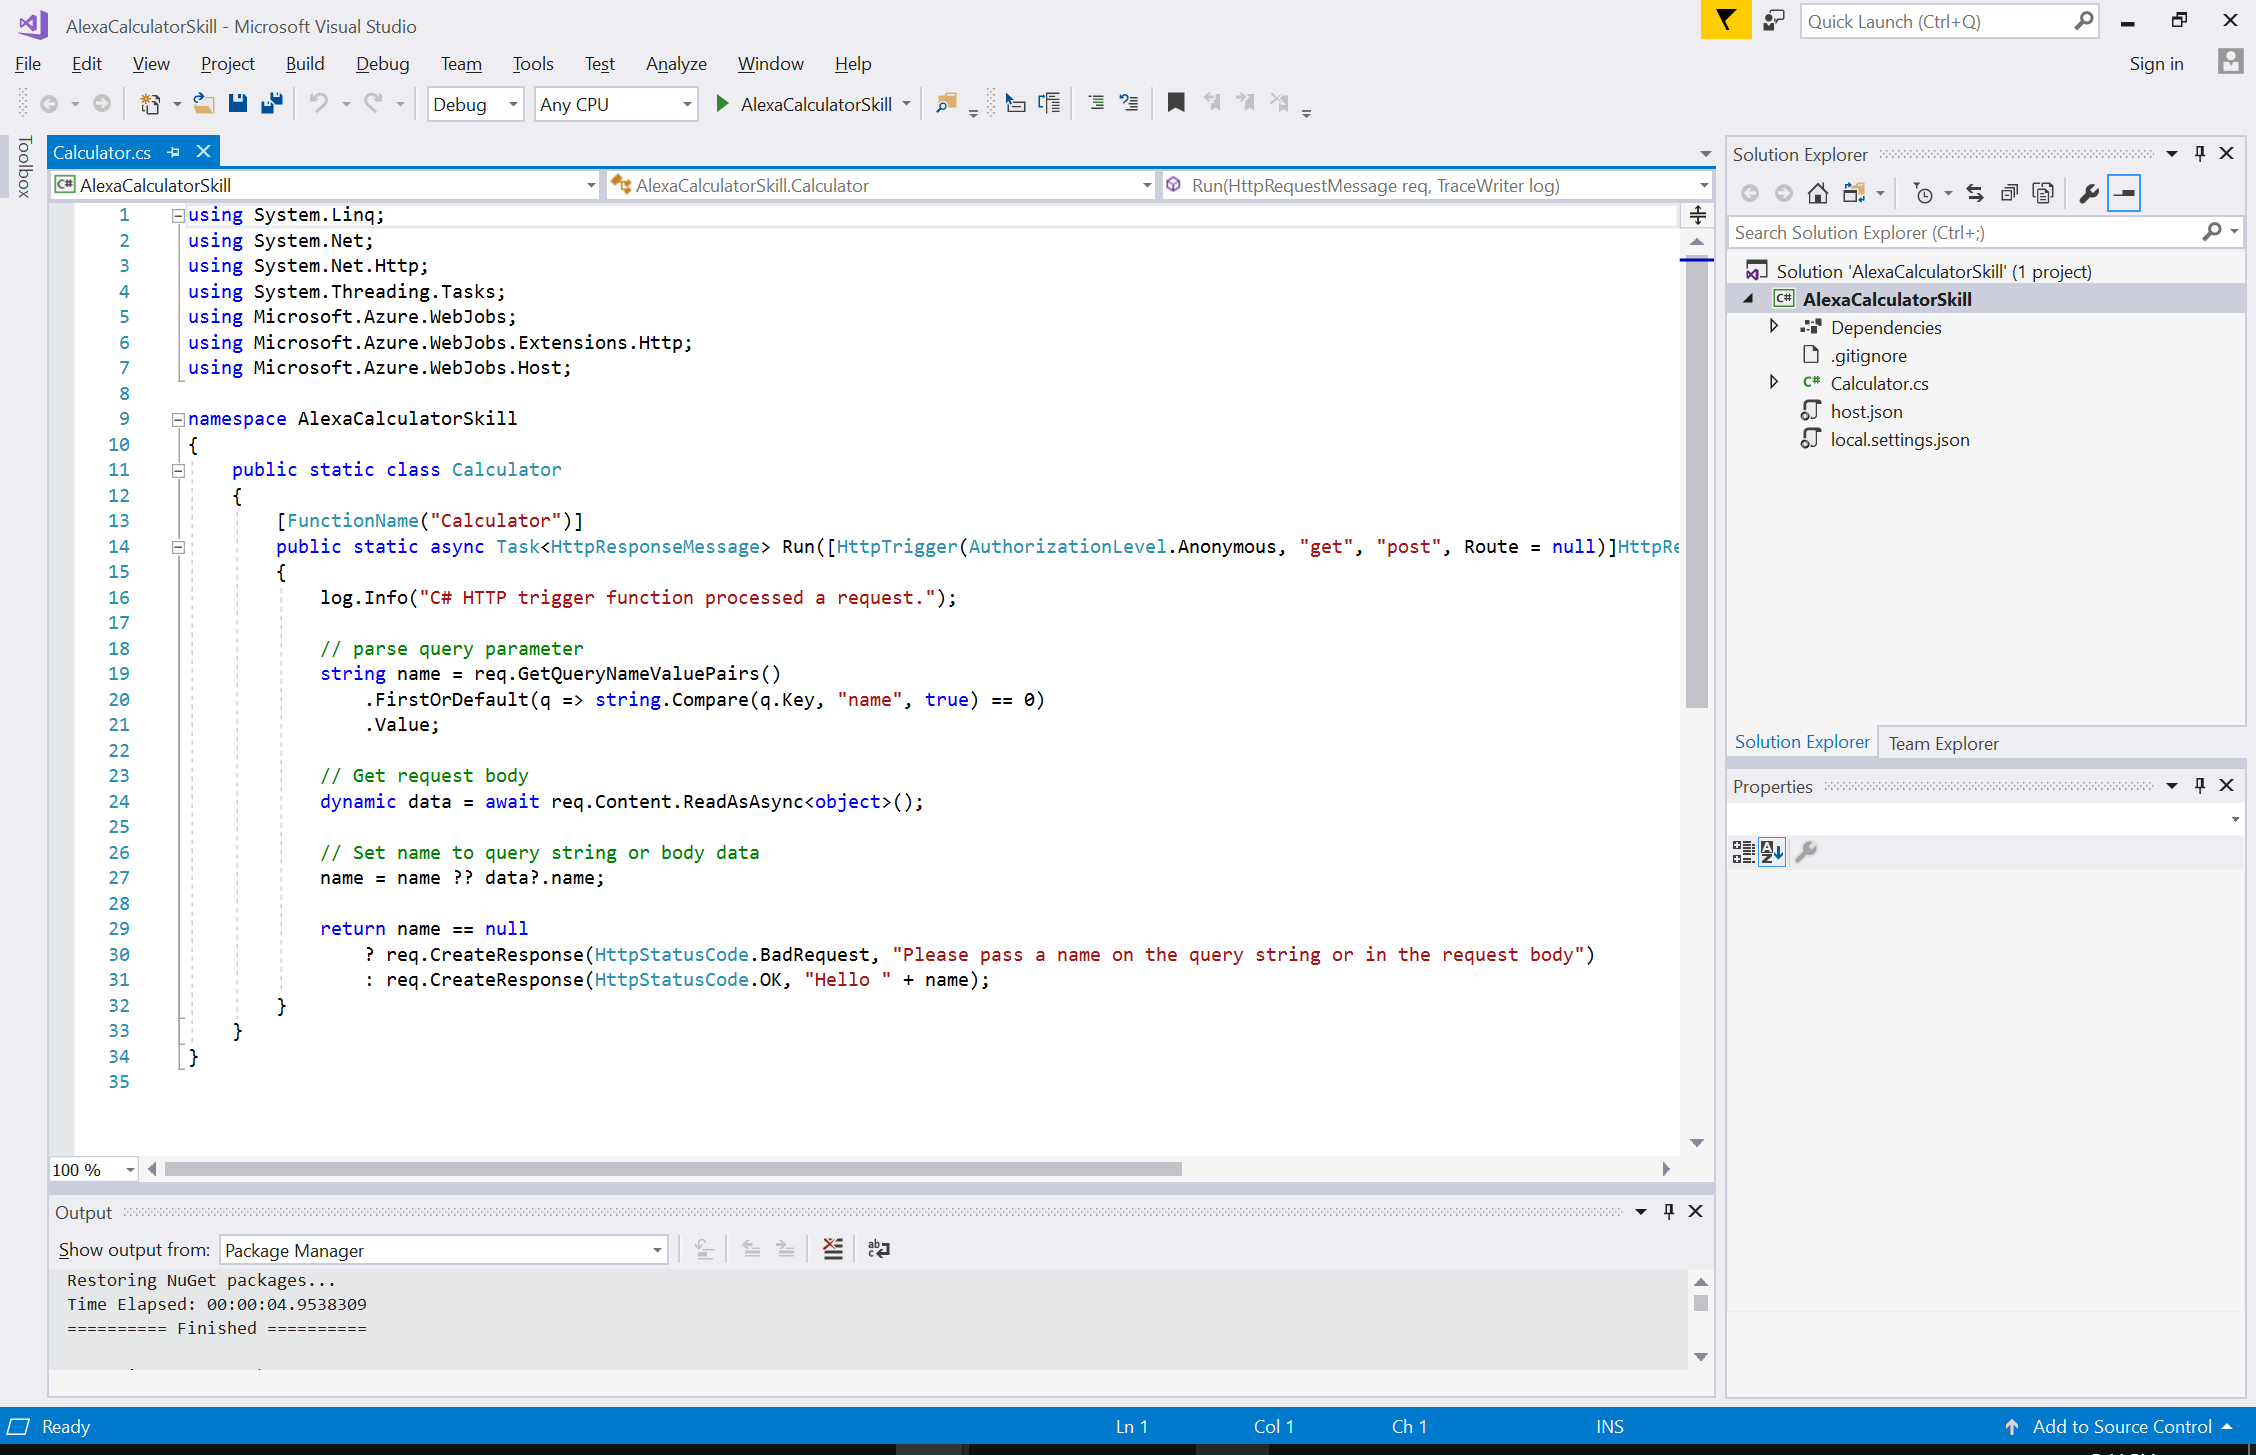
At this point, we are ready to handle the Alexa request, perform whatever logic our skill provides, and return the formatted response. You could leverage a library that makes this nicer (like Alexa.NET), but the Alexa request/response documentation can be found here so we will just do it the old-fashioned way to show that there is nothing magic about it.
Using the dynamic keyword, we can easily parse the incoming request into a JSON-like object with a single line:
// Get request body
dynamic data = await req.Content.ReadAsAsync<object>();
The Alexa documentation tells us that we can expect either a LaunchRequest (when the skill is opened with no specific request) or an IntentRequest (when a specific request is made), so let's handle both of those cases:
switch (data.request.type)
{
    case "IntentRequest":

    case "LaunchRequest":

}
For the IntentRequest, we want to check the data.request.intent.name to see which action the user was requesting:
string intentName = data.request.intent.name;
switch (intentName)
{
    case "AddIntent":

    case "SubtractIntent":

}
For our simple calculator, we will only allow adding or subtracting two numbers, so we can extract the two numbers from the slots:
var n1 = Convert.ToDouble(data.request.intent.slots["firstnum"].value);
var n2 = Convert.ToDouble(data.request.intent.slots["secondnum"].value);
After we perform the calculation, we need to return the response in a format that Alexa can understand, so let's create a simple helper function to return responses:
private static HttpResponseMessage CreateResponse(HttpRequestMessage req, string title, string text)
{
    return req.CreateResponse(HttpStatusCode.OK, new
    {
        version = "1.0",
        sessionAttributes = new { },
        response = new
        {
            outputSpeech = new
            {
                type = "PlainText",
                text = text
            },
            card = new
            {
                type = "Simple",
                title = title,
                content = text
            },
            shouldEndSession = false
        }
    });
}
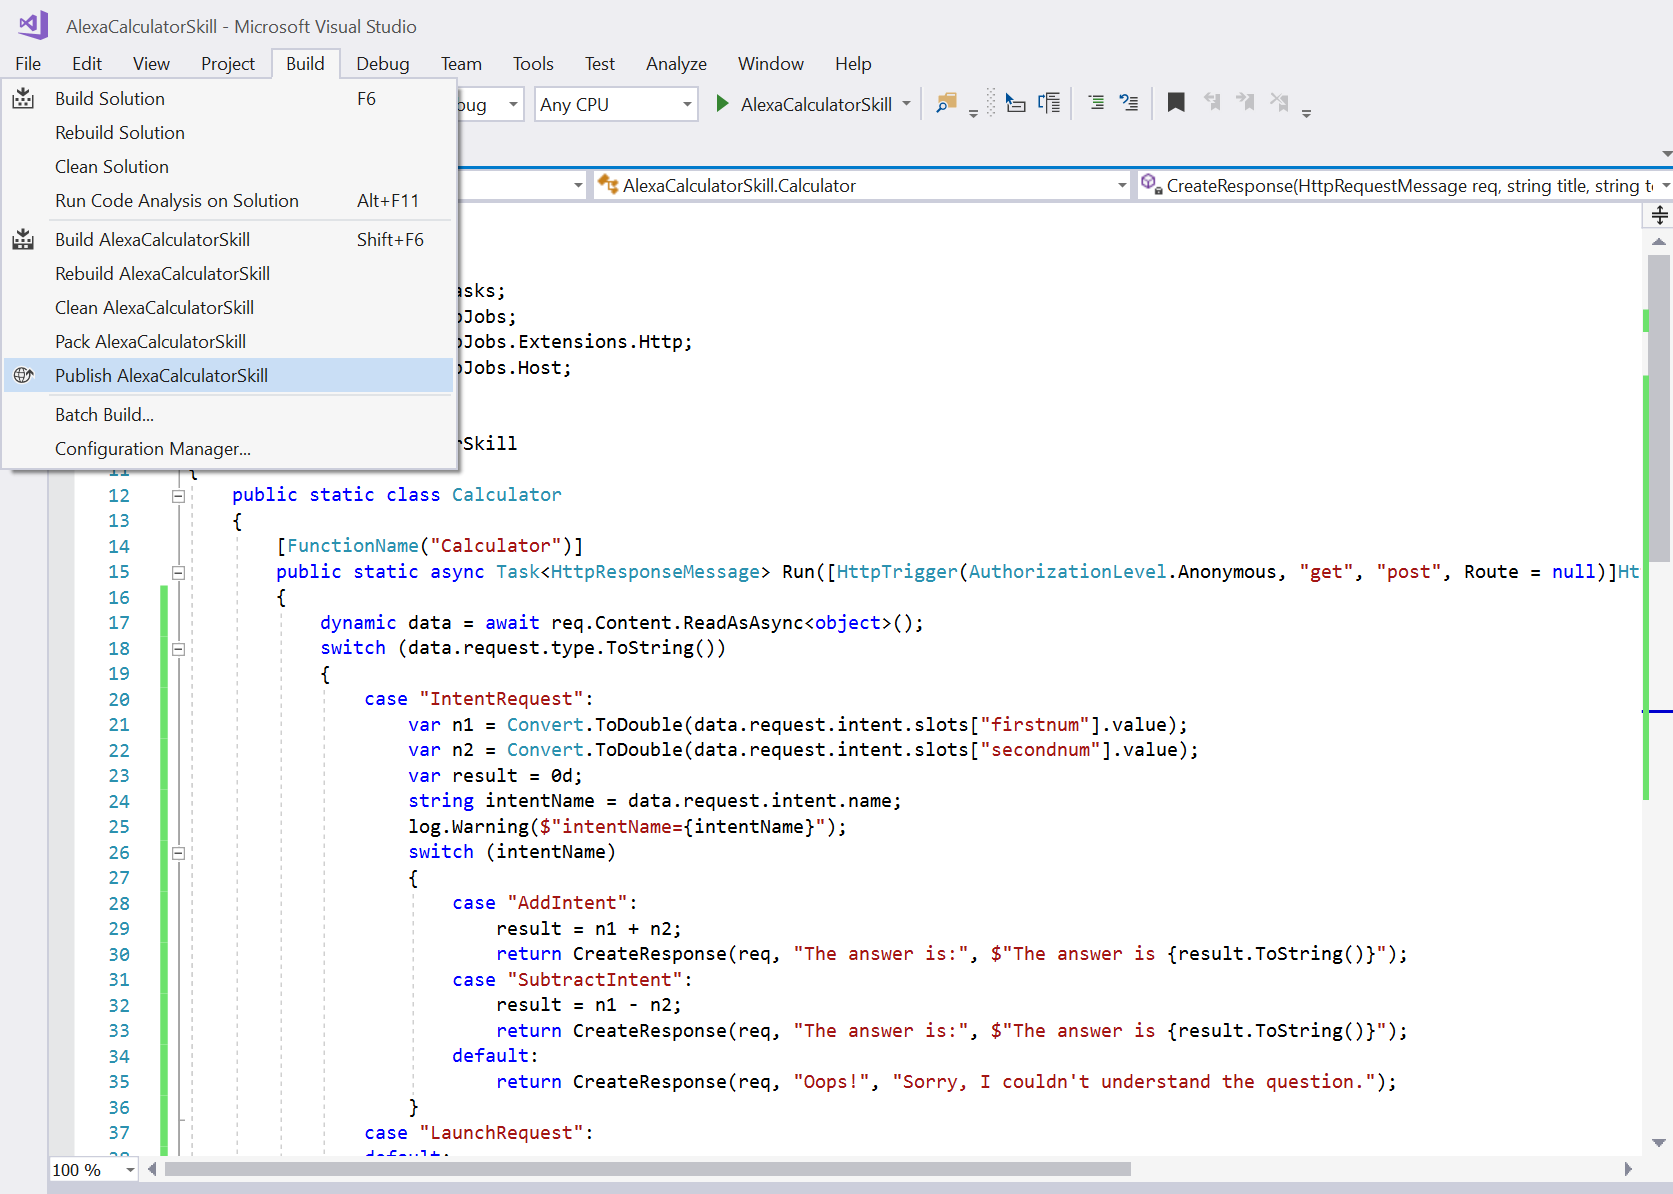
Putting it all together, it looks something like:
using System.Linq;
using System.Net;
using System.Net.Http;
using System.Threading.Tasks;
using Microsoft.Azure.WebJobs;
using Microsoft.Azure.WebJobs.Extensions.Http;
using Microsoft.Azure.WebJobs.Host;
using System;

namespace AlexaCalculatorSkill
{
    public static class Calculator
    {
        [FunctionName("Calculator")]
        public static async Task<HttpResponseMessage> Run([HttpTrigger(AuthorizationLevel.Anonymous, "get", "post", Route = null)]HttpRequestMessage req, TraceWriter log)
        {
            dynamic data = await req.Content.ReadAsAsync<object>();
            switch (data.request.type.ToString())
            {
                case "IntentRequest":
                    var n1 = Convert.ToDouble(data.request.intent.slots["firstnum"].value);
                    var n2 = Convert.ToDouble(data.request.intent.slots["secondnum"].value);
                    var result = 0d;
                    string intentName = data.request.intent.name;
                    log.Warning($"intentName={intentName}");
                    switch (intentName)
                    {
                        case "AddIntent":
                            result = n1 + n2;
                            return CreateResponse(req, "The answer is:", $"The answer is {result.ToString()}");
                        case "SubtractIntent":
                            result = n1 - n2;
                            return CreateResponse(req, "The answer is:", $"The answer is {result.ToString()}");
                        default:
                            return CreateResponse(req, "Oops!", "Sorry, I couldn't understand the question.");
                    }
                case "LaunchRequest":
                default:
                    log.Info($"Default LaunchRequest made");
                    return CreateResponse(req, "Welcome to the Alexa Calculator", "Try asking: what is 3 plus 4?");
            }
        }

        private static HttpResponseMessage CreateResponse(HttpRequestMessage req, string title, string text)
        {
            return req.CreateResponse(HttpStatusCode.OK, new
            {
                version = "1.0",
                sessionAttributes = new { },
                response = new
                {
                    outputSpeech = new
                    {
                        type = "PlainText",
                        text = text
                    },
                    card = new
                    {
                        type = "Simple",
                        title = title,
                        content = text
                    },
                    shouldEndSession = false
                }
            });
        }
    }
}
Another great thing about using Visual Studio to develop our function is that we can test it locally. Just F5 Run the project and the Azure Function test environment will load up.
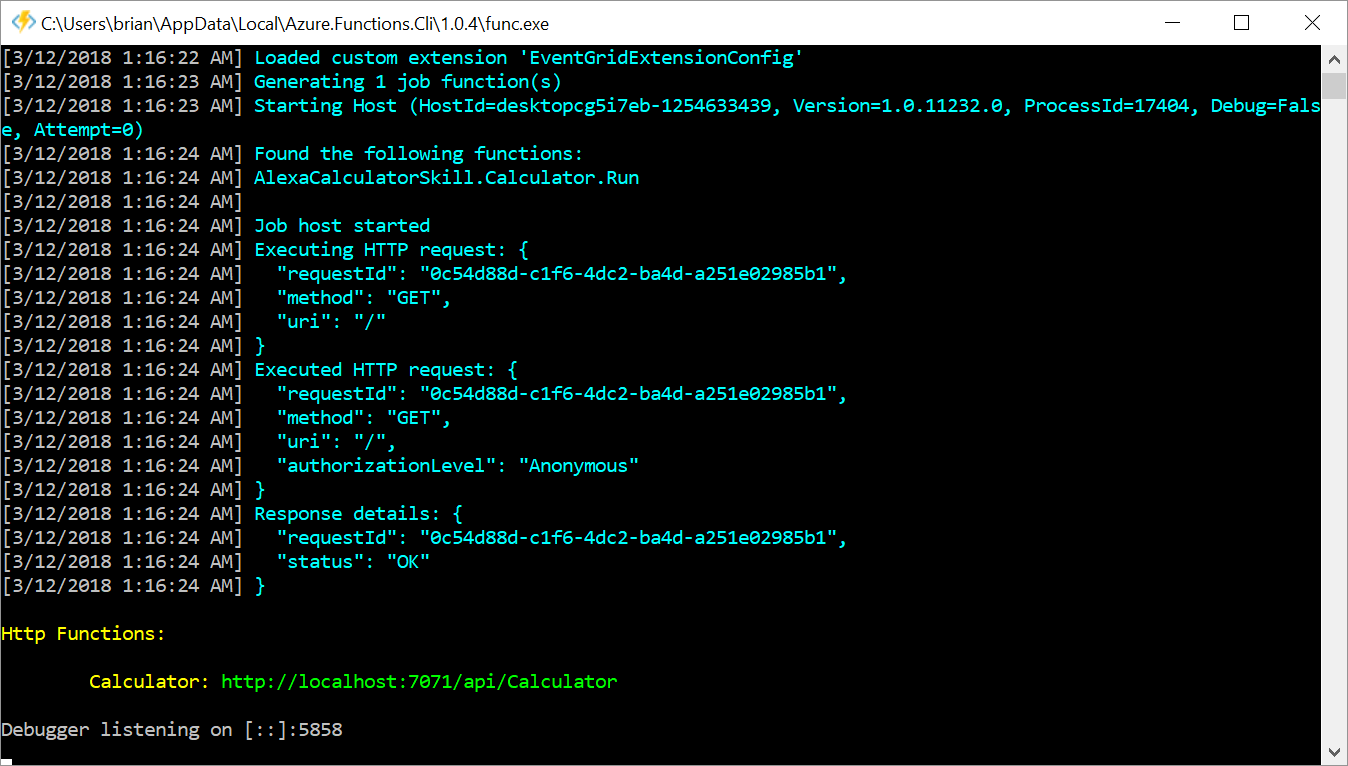
You can use the localhost url to trigger your function. You could use curl, but I like Postman for this kind of thing. Based on the Alexa request documentation, we can construct a simple request that looks like this:
{
  "session": {
    "new": true,
    "sessionId": "SessionId.a2dd3f0c-6dd2-4612-912f-70d7b1e33529",
    "application": {
      "applicationId": "amzn1.ask.skill.<App Id>"
    },
    "attributes": {},
    "user": {
      "userId": "amzn1.ask.account.<User Id>"
    }
  },
  "request": {
    "type": "IntentRequest",
    "requestId": "EdwRequestId.218a12f7-bda2-4d1d-95c7-296813f4213a",
    "intent": {
      "name": "AddIntent",
      "slots": {
        "firstnum": {
          "name": "firstnum",
          "value": "3"
        },
        "secondnum": {
          "name": "secondnum",
          "value": "4"
        }
      }
    },
    "locale": "en-US",
    "timestamp": "2018-03-11T14:23:47Z"
  },
  "context": {
    "AudioPlayer": {
      "playerActivity": "IDLE"
    },
    "System": {
      "application": {
        "applicationId": "amzn1.ask.skill.<App Id>"
      },
      "user": {
        "userId": "amzn1.ask.account.<User Id>"
      },
      "device": {
        "supportedInterfaces": {}
      }
    }
  },
  "version": "1.0"
}
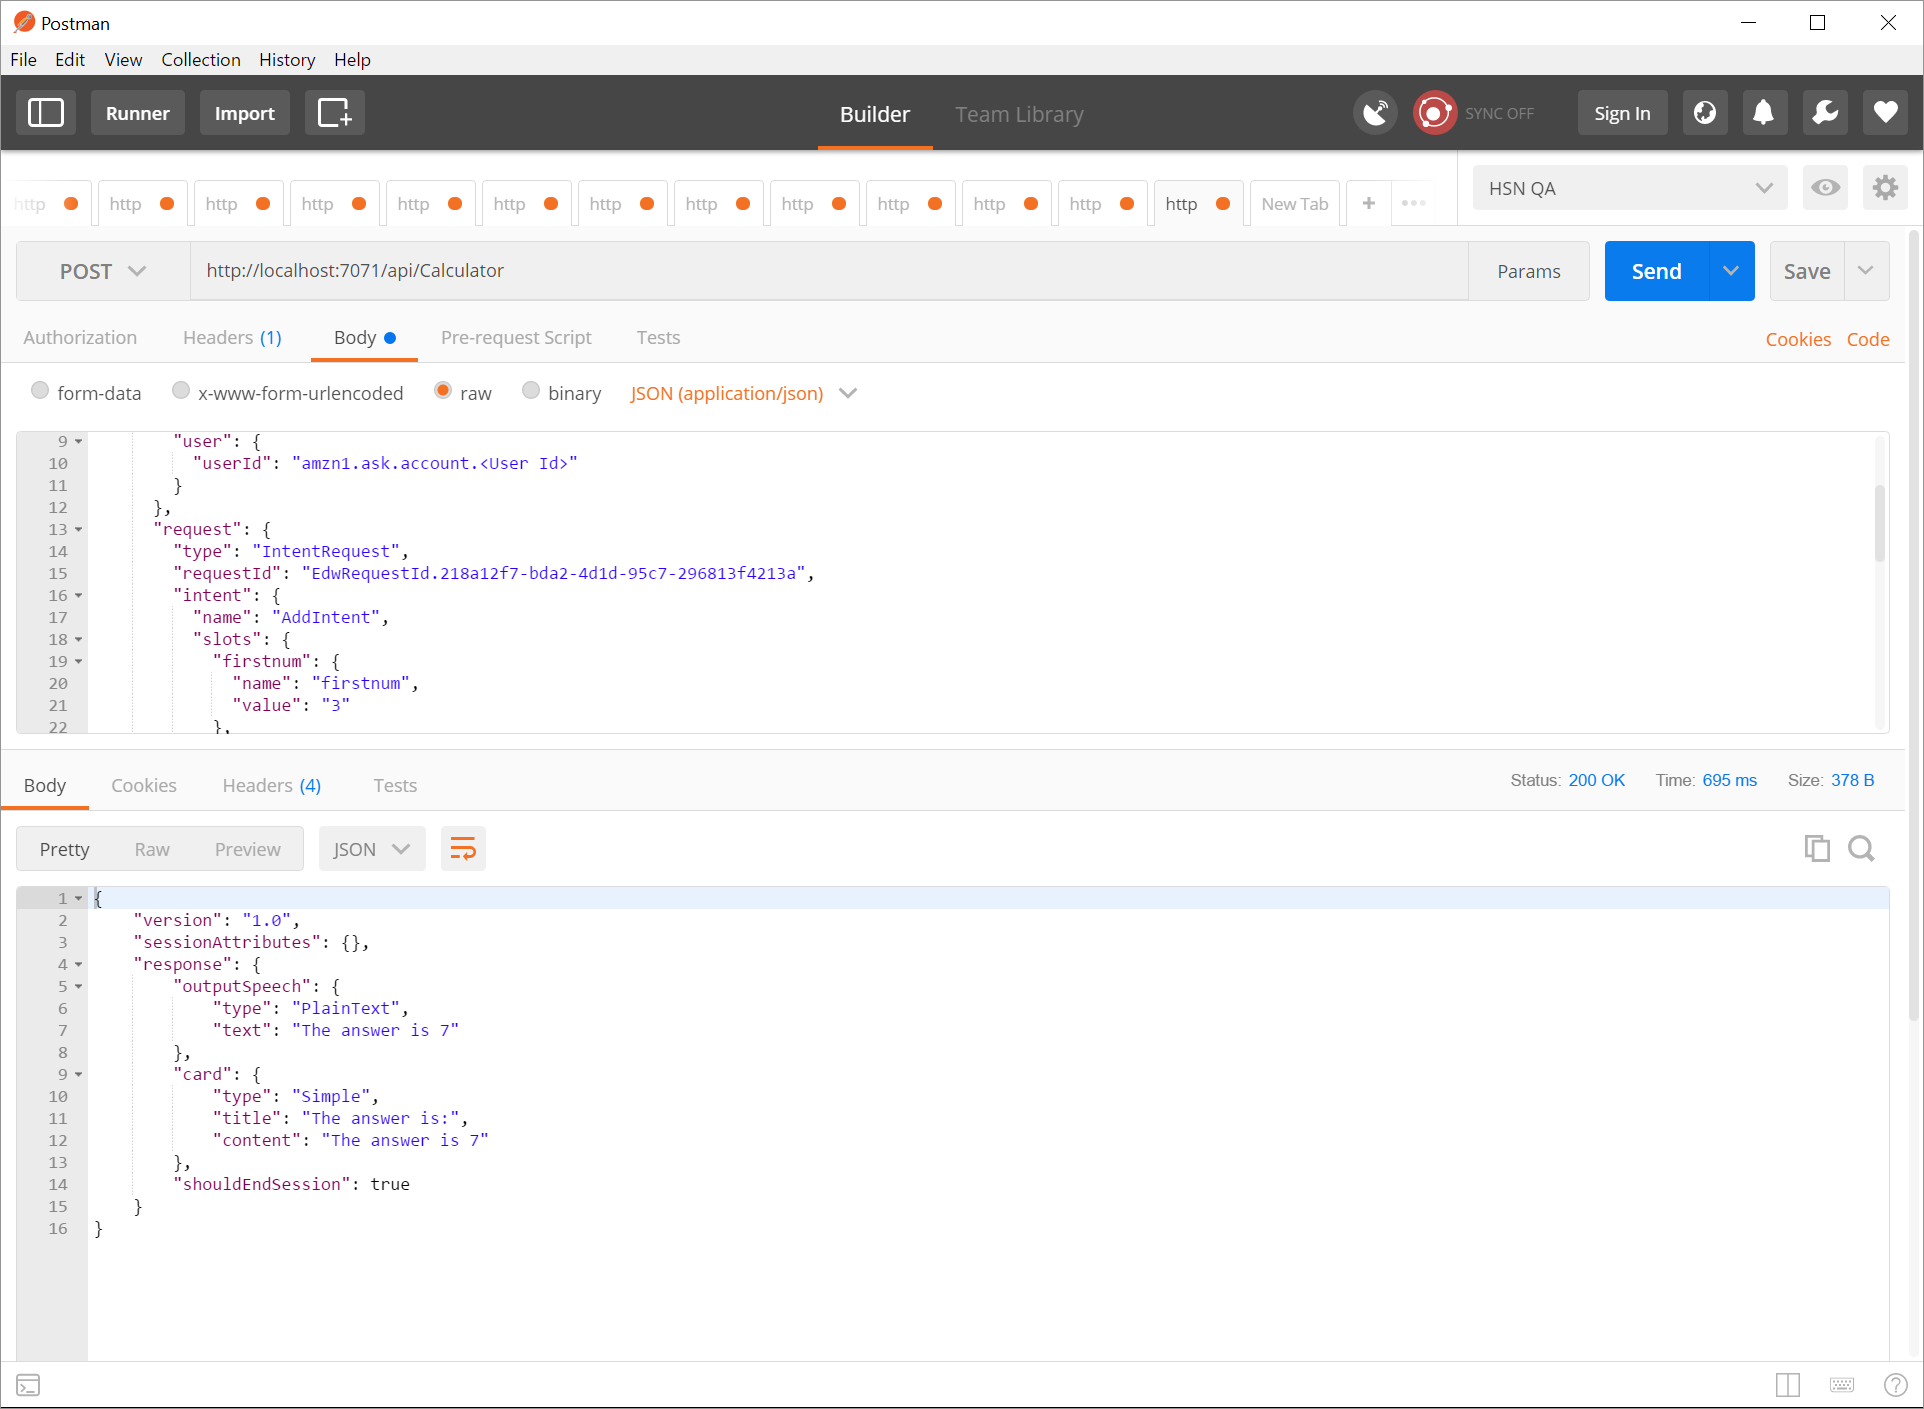
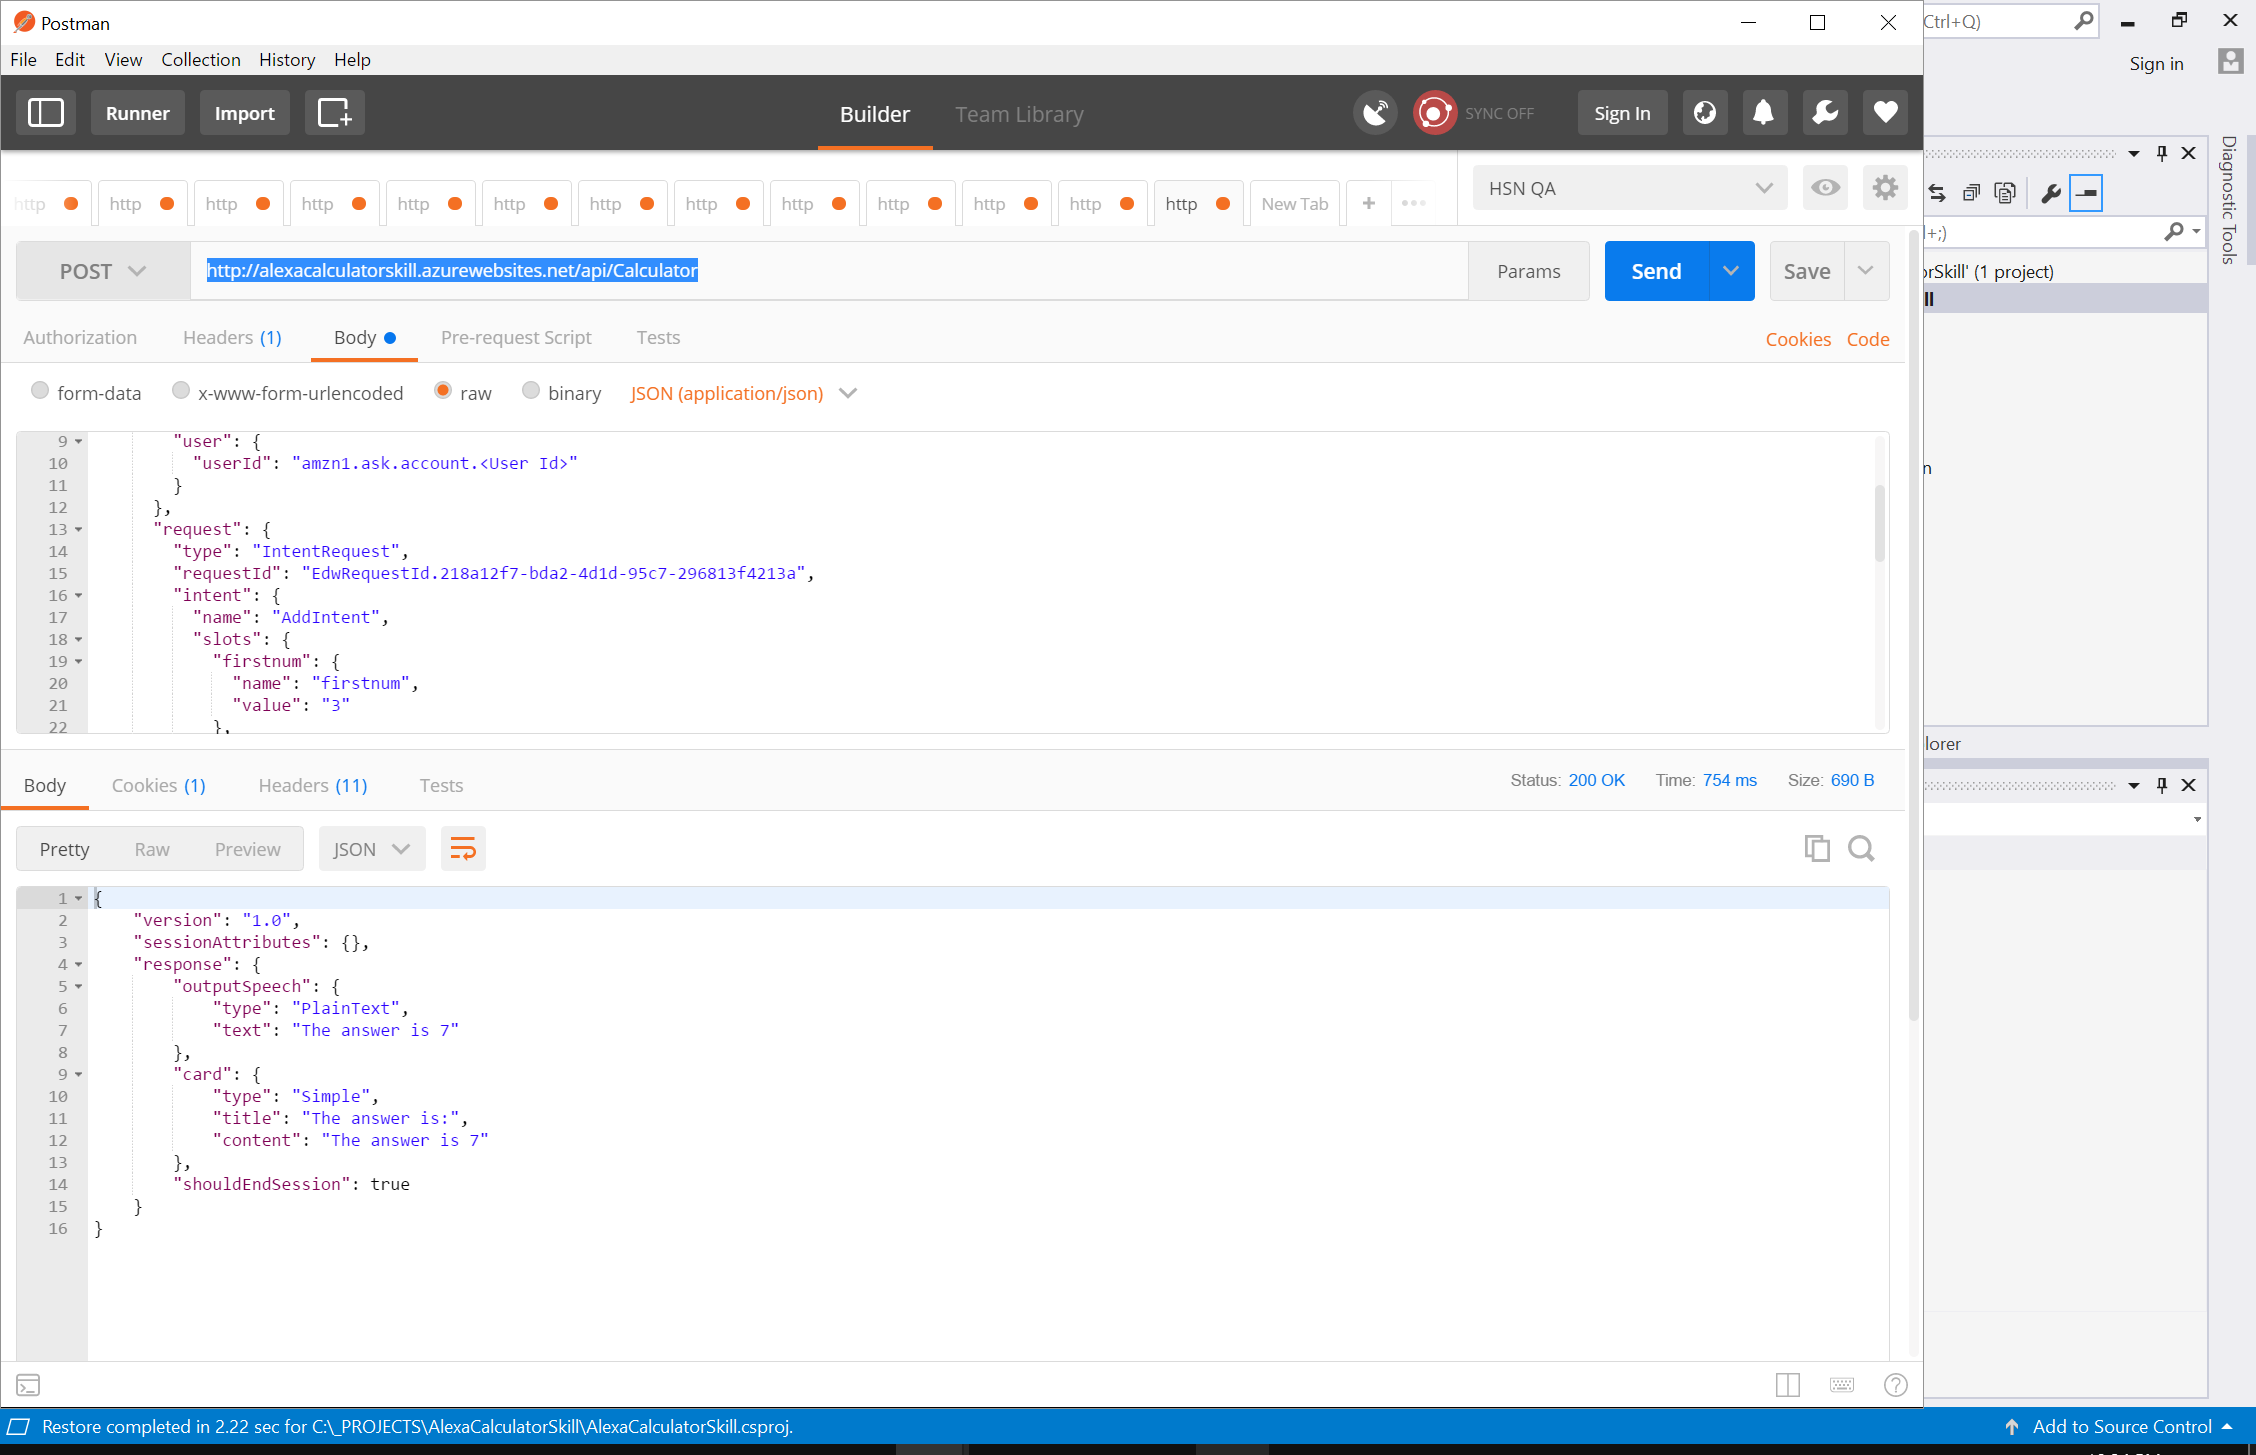
Running it in Postman, you can see that the function is returning the expected response:
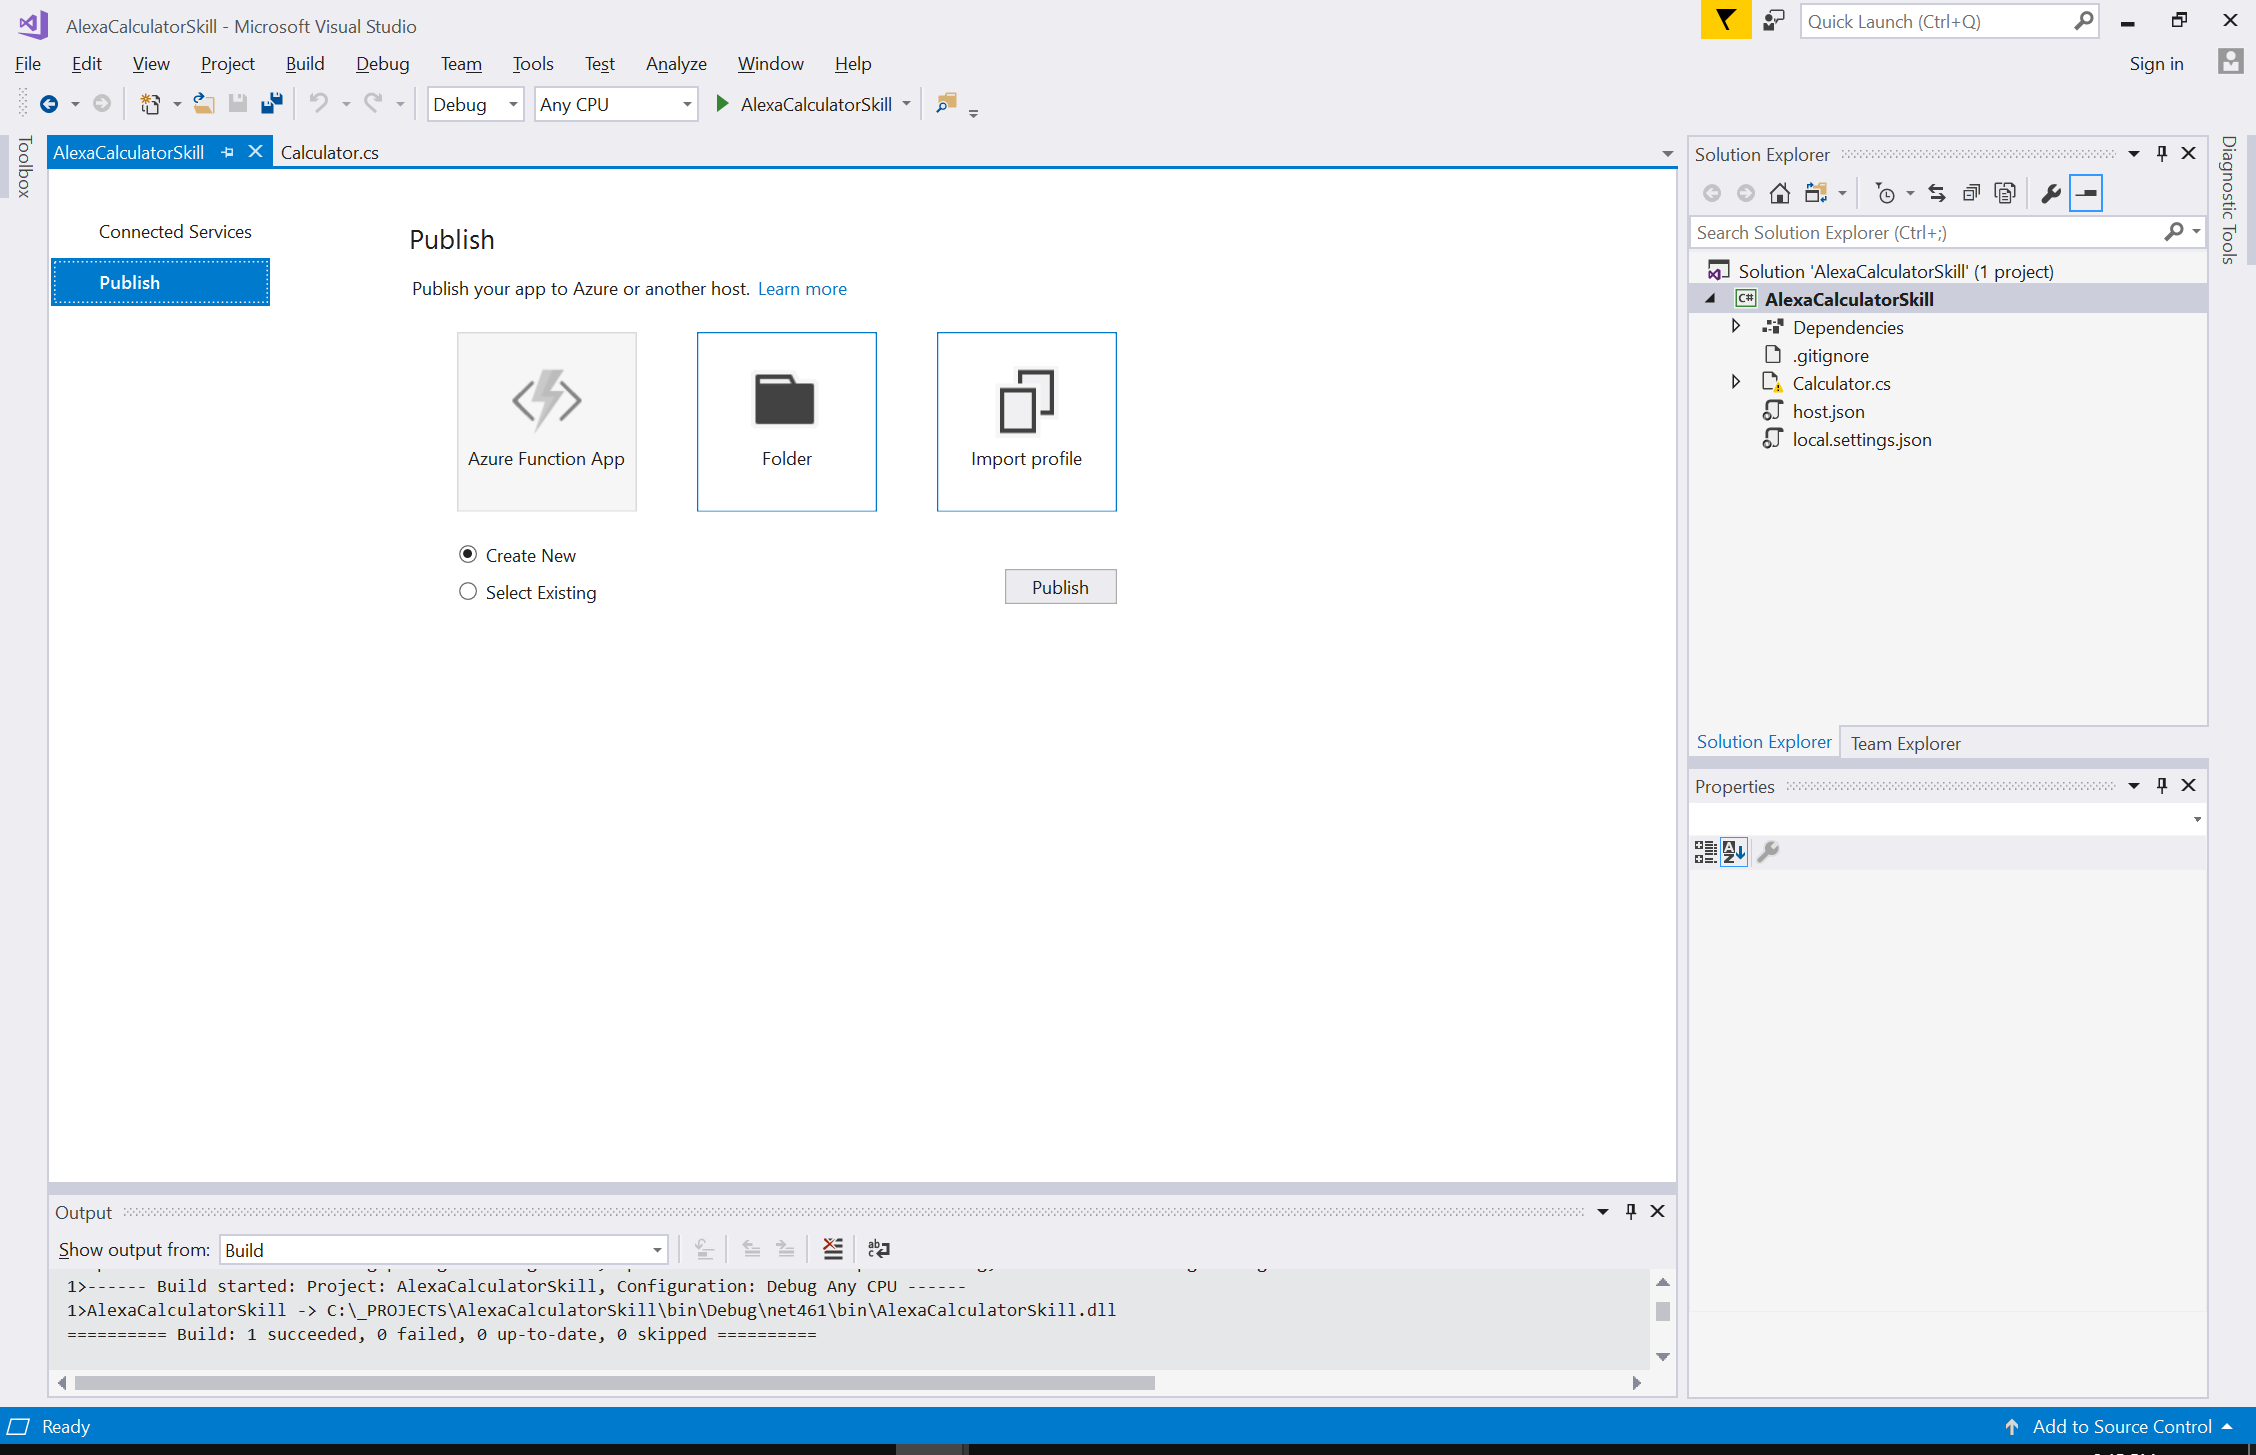
Now that your function is working locally, it is time to push it up to the cloud. Choose Build > Publish and you will be presented with some options. Since this is a new function, choose Create New.
You will be presented with a screen where you can configure your new function and the backing App Service Plan and Azure Storage Account. If this is your first Azure Function, you can go ahead and create new resources (or if you already have Azure resources that you want to use, that is fine as well).
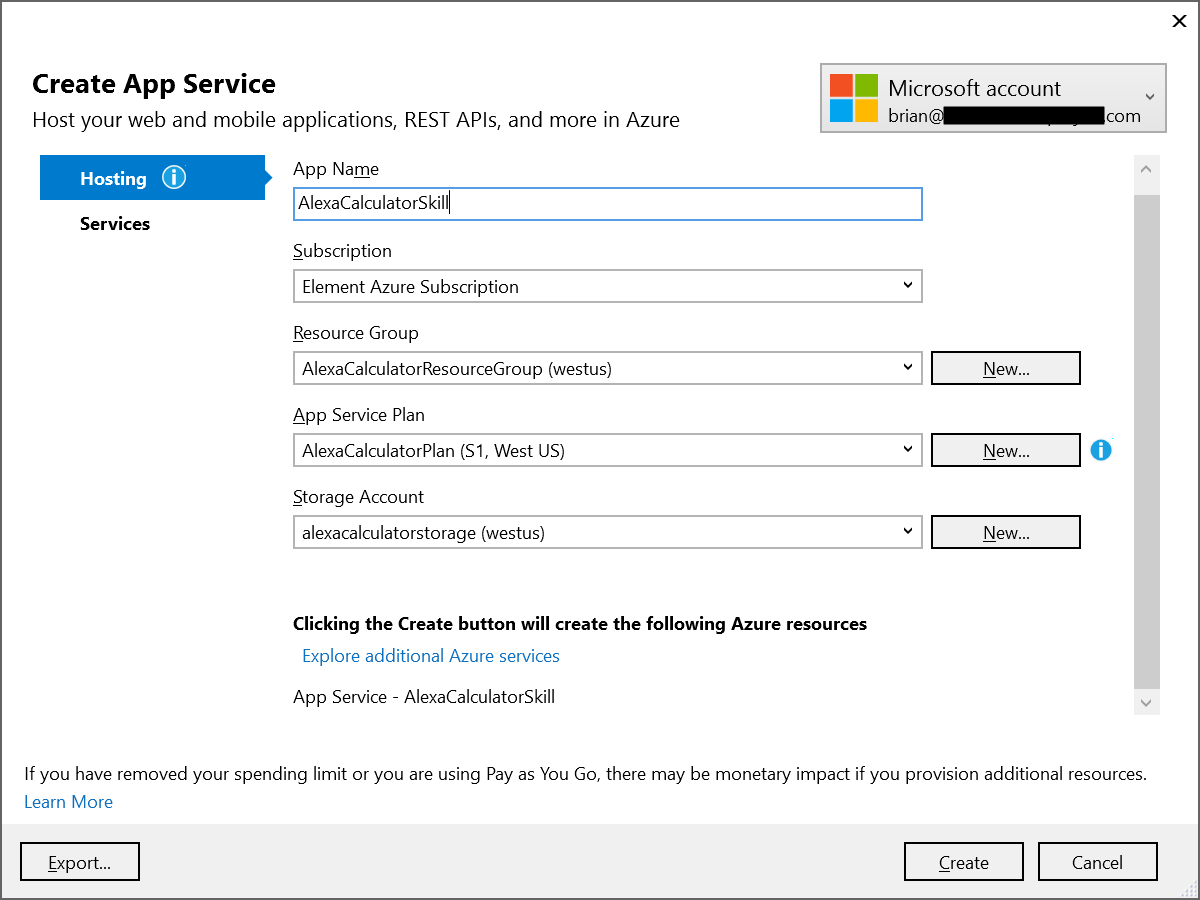
After the Azure resources are created, click Publish and Visual Studio will deploy your function up to the cloud.
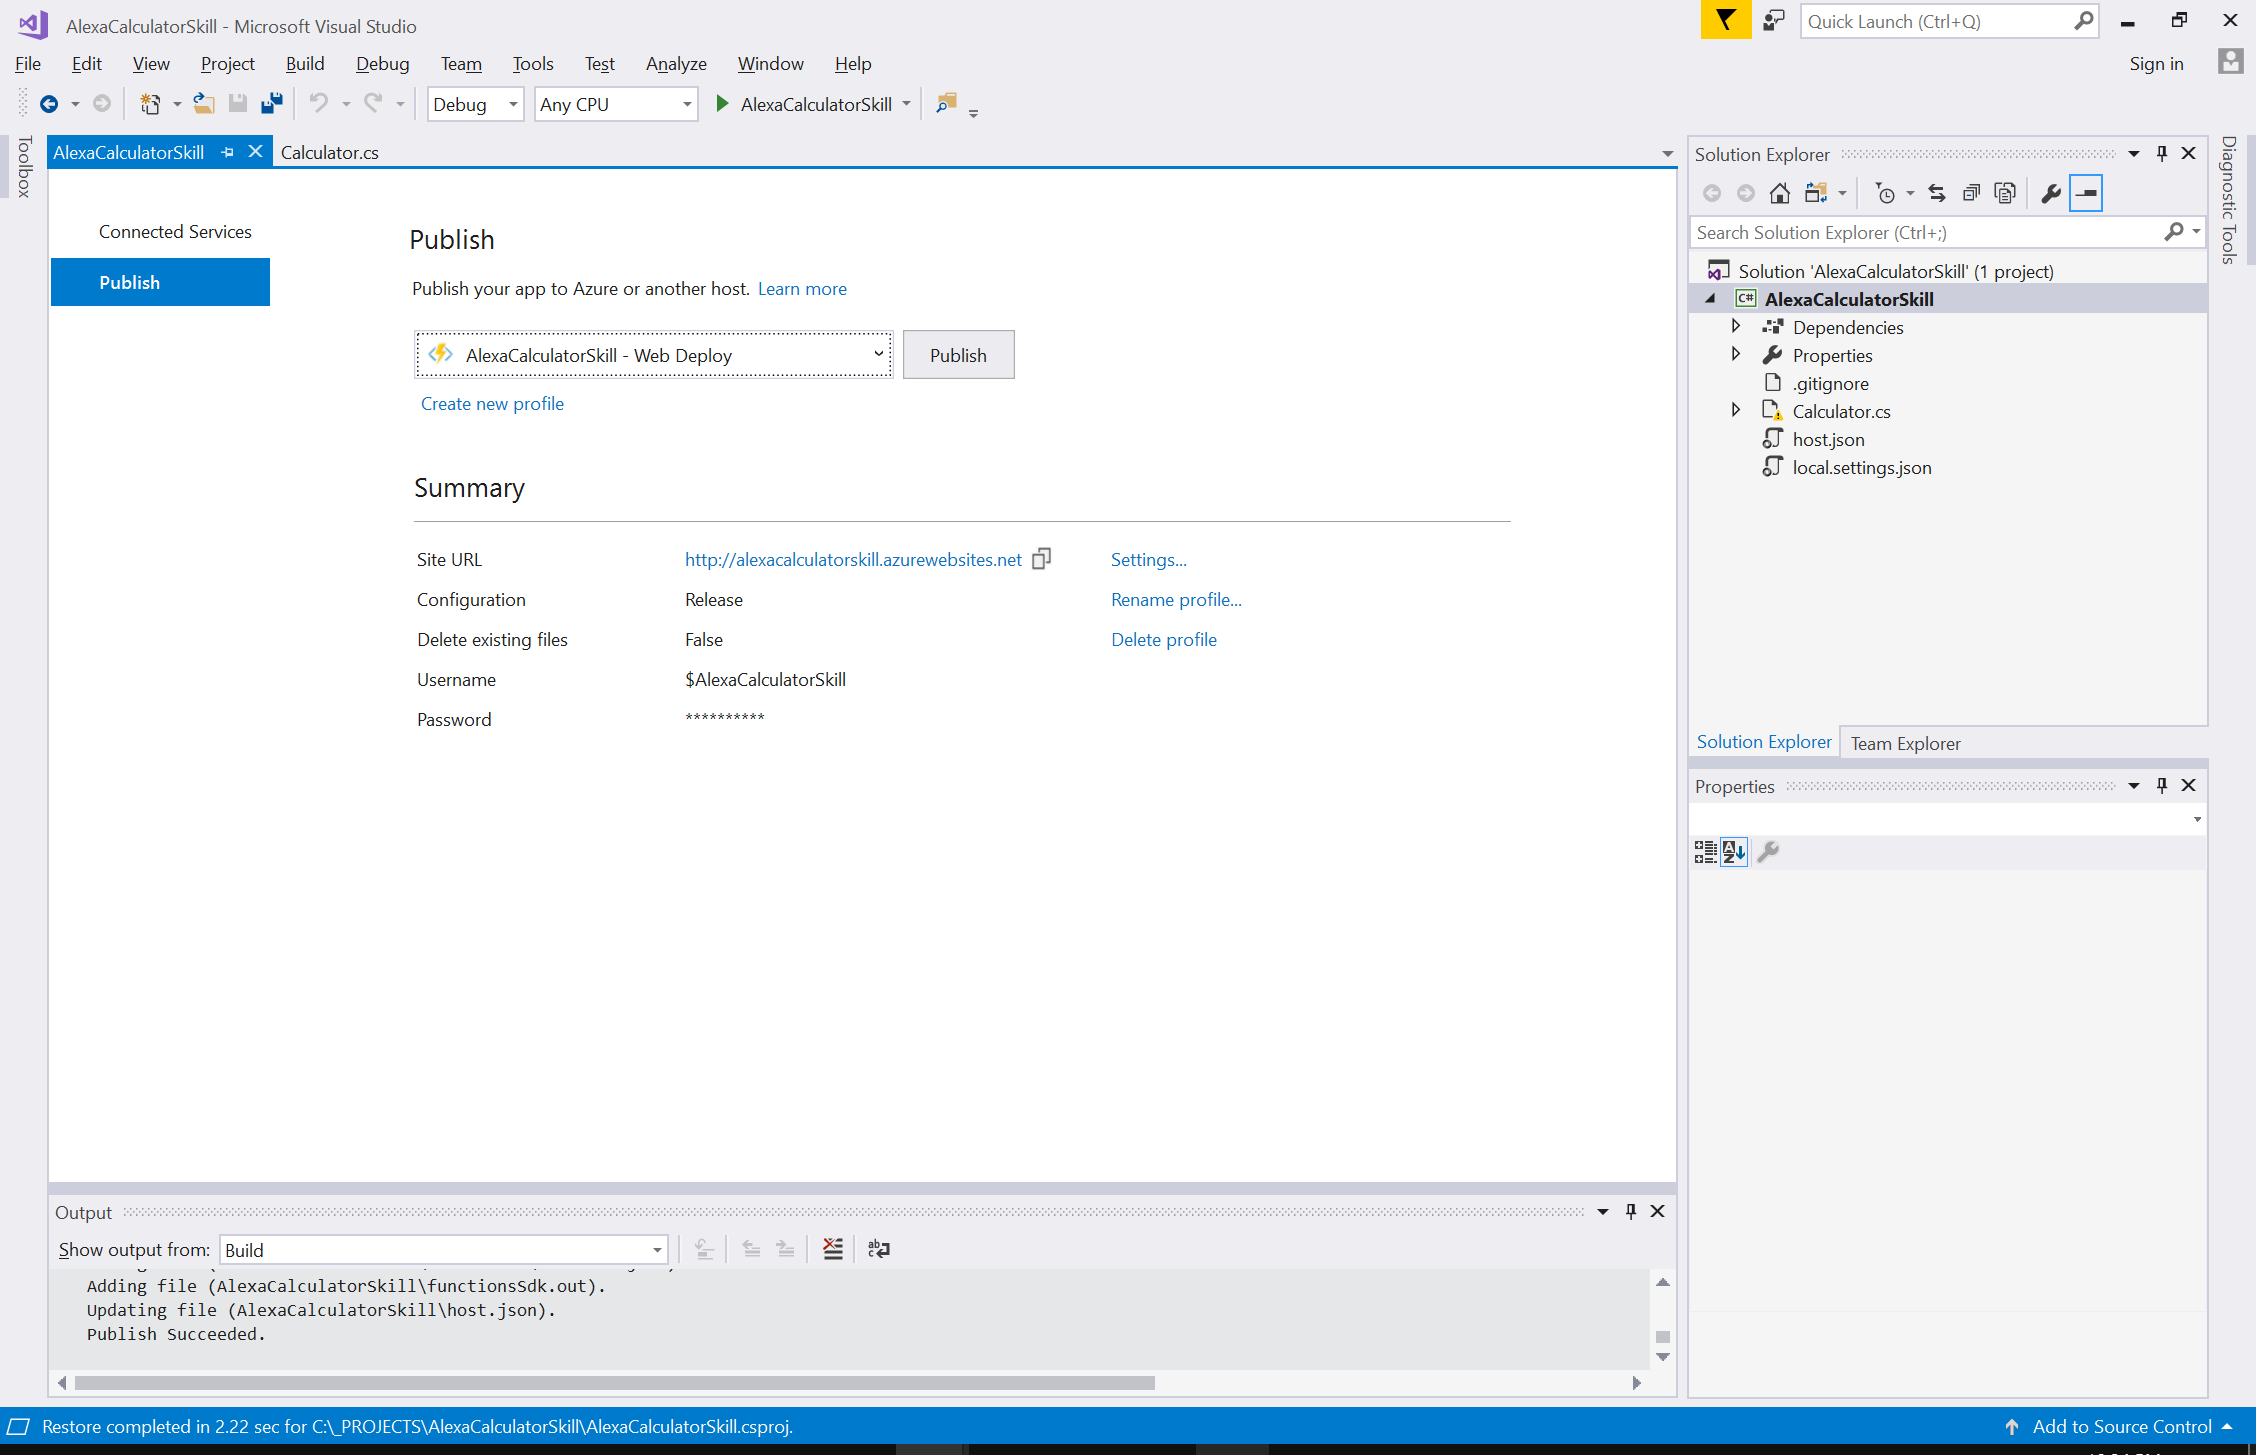
You can copy theSite URL value and update your Postman request to test out your newly deployed function:
Now that you have your function up and running on Azure, it is time to wire it up to Alexa.
Creating the Alexa Skill
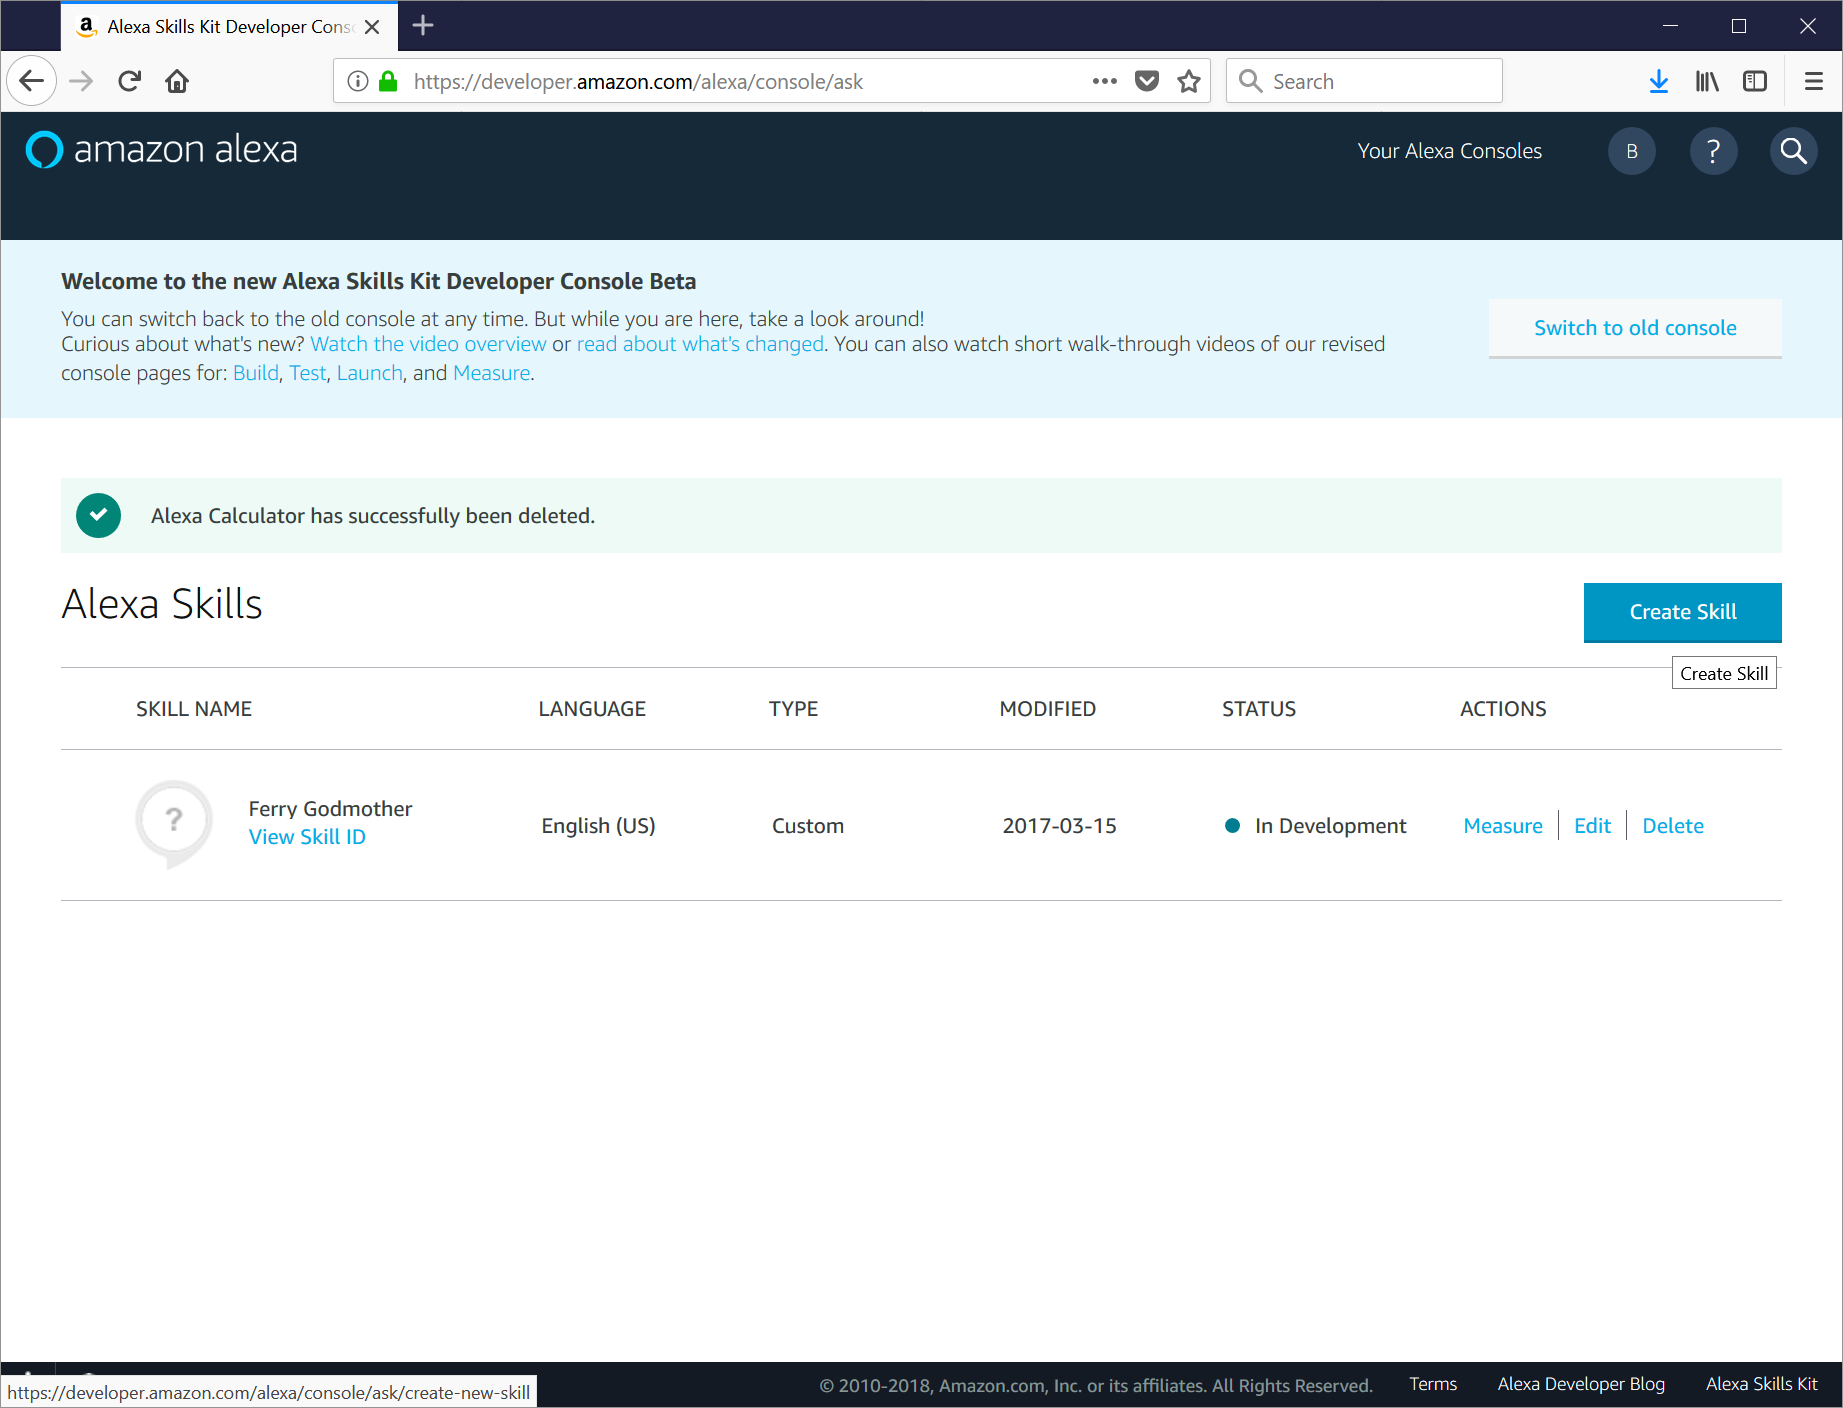
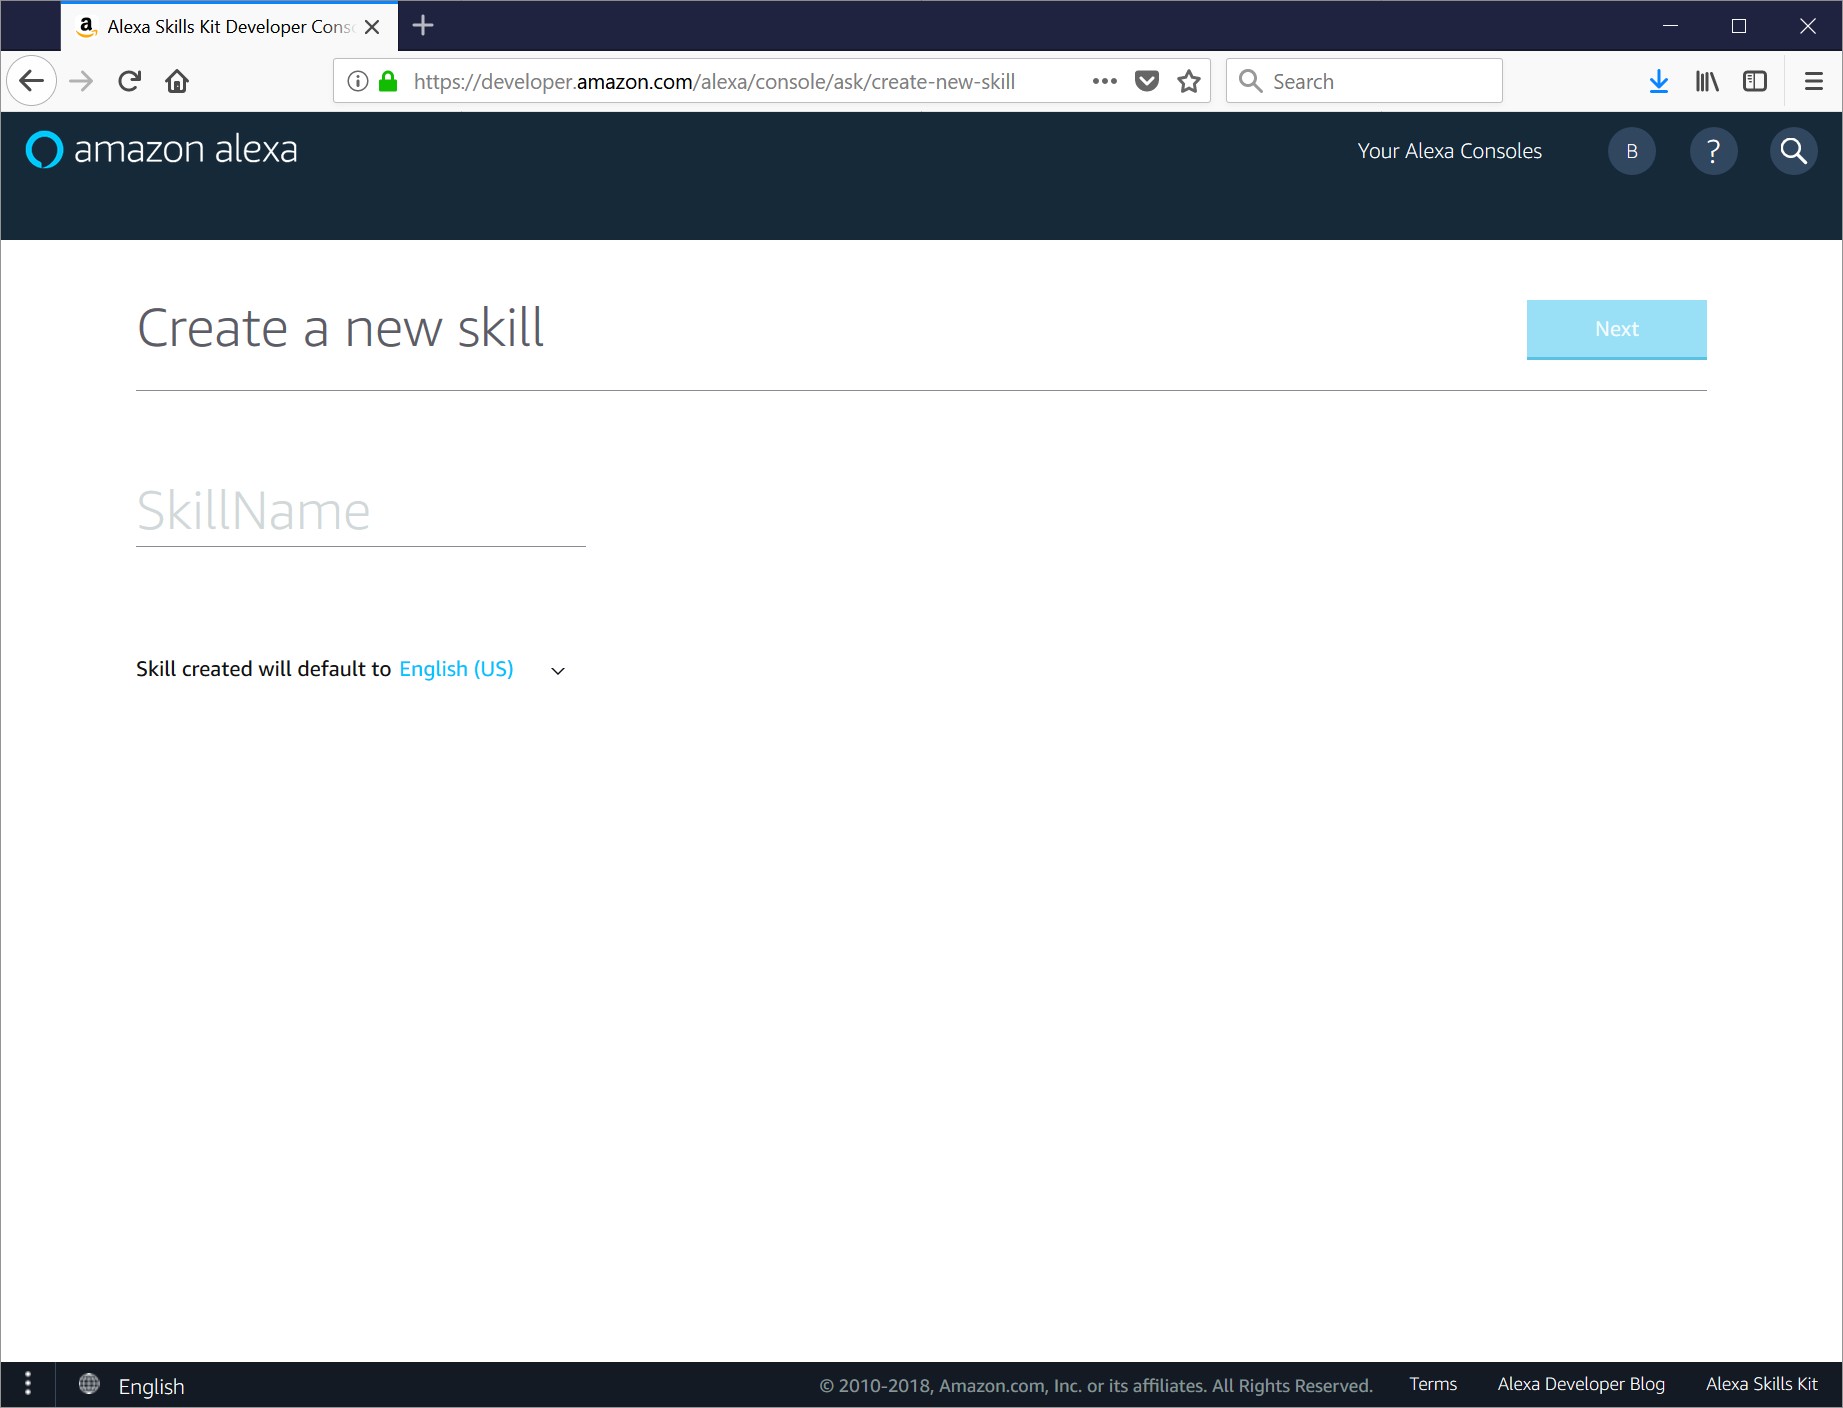
To create your skill, log in to the Alexa console (creating an AWS developer account if you do not already have one). Note that (as of early 2018) there are two different consoles - the 'classic' console and the new 'beta' console. The beta console will replace the classic console soon, so you should be using it to configure your skill. Click Create Skill and you will be prompted for the name of your skill.
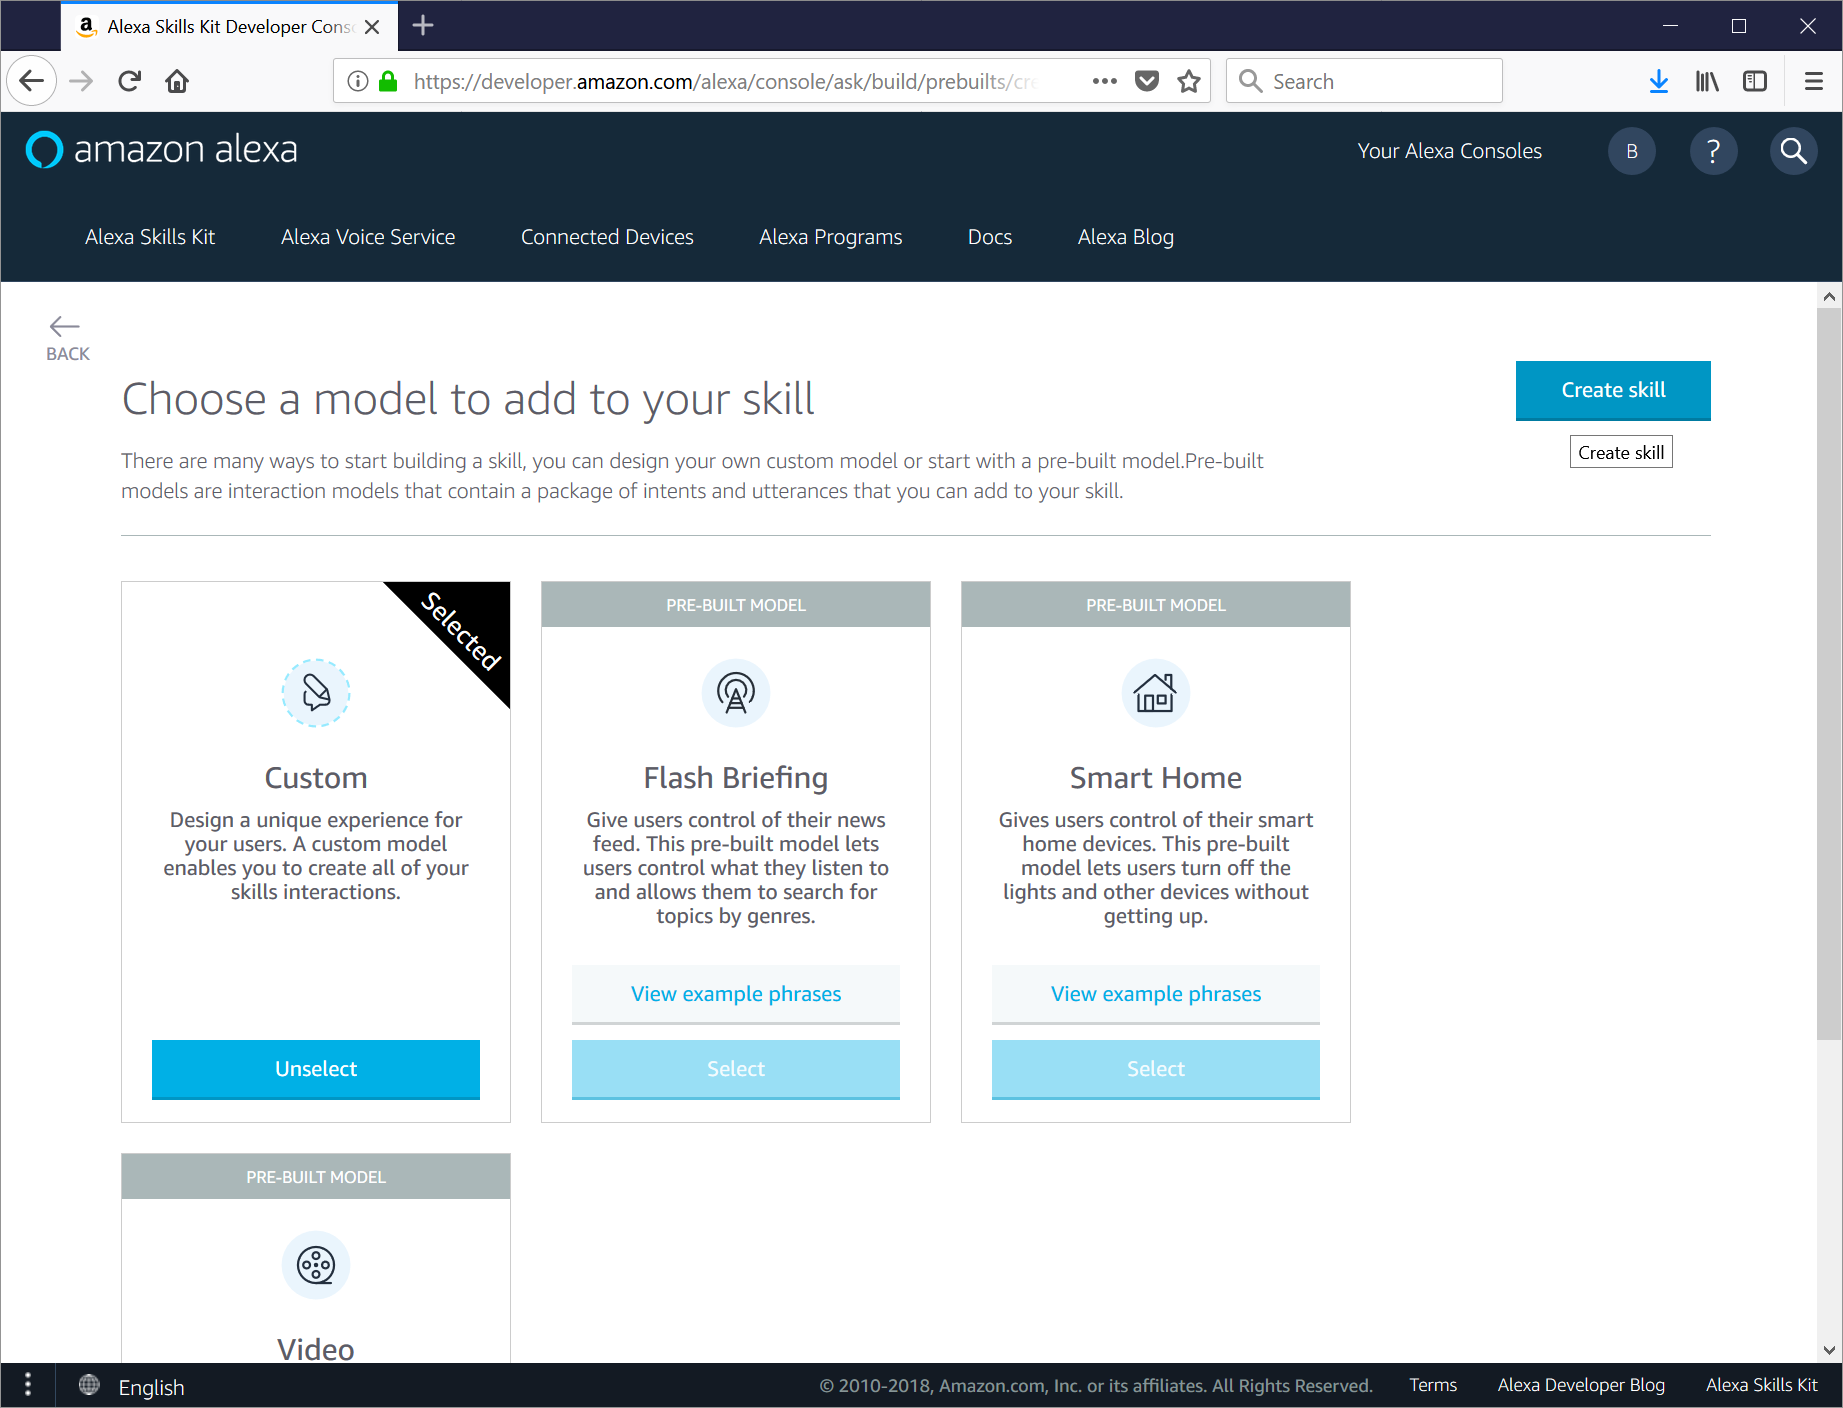
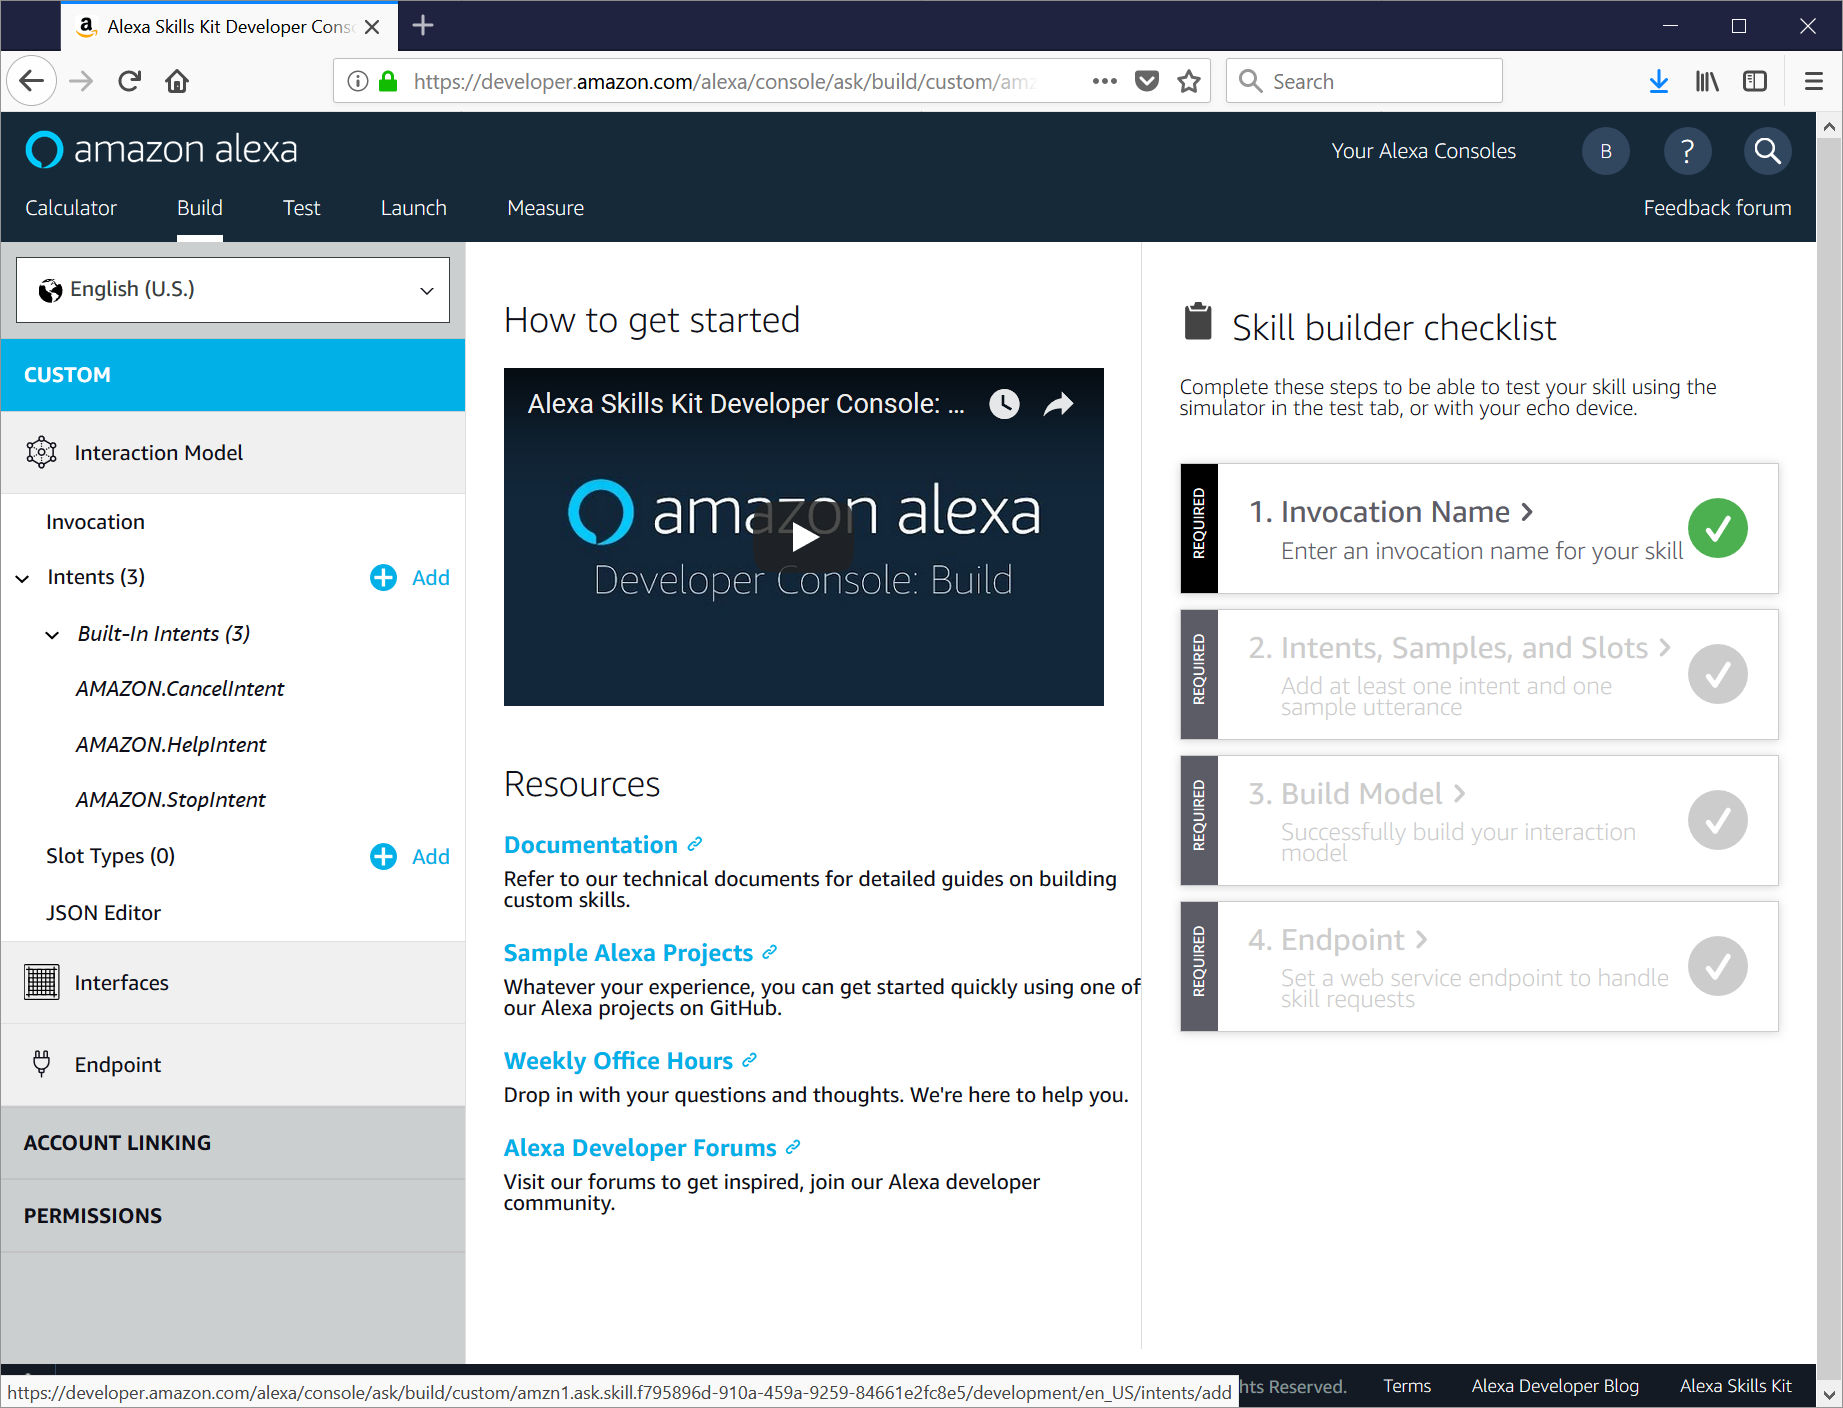
Next up, you will be asked to choose the interaction model for your skill. Since this is a custom skill, select Custom and then click Create Skill. After a few seconds, you will be dropped into the skill builder console.
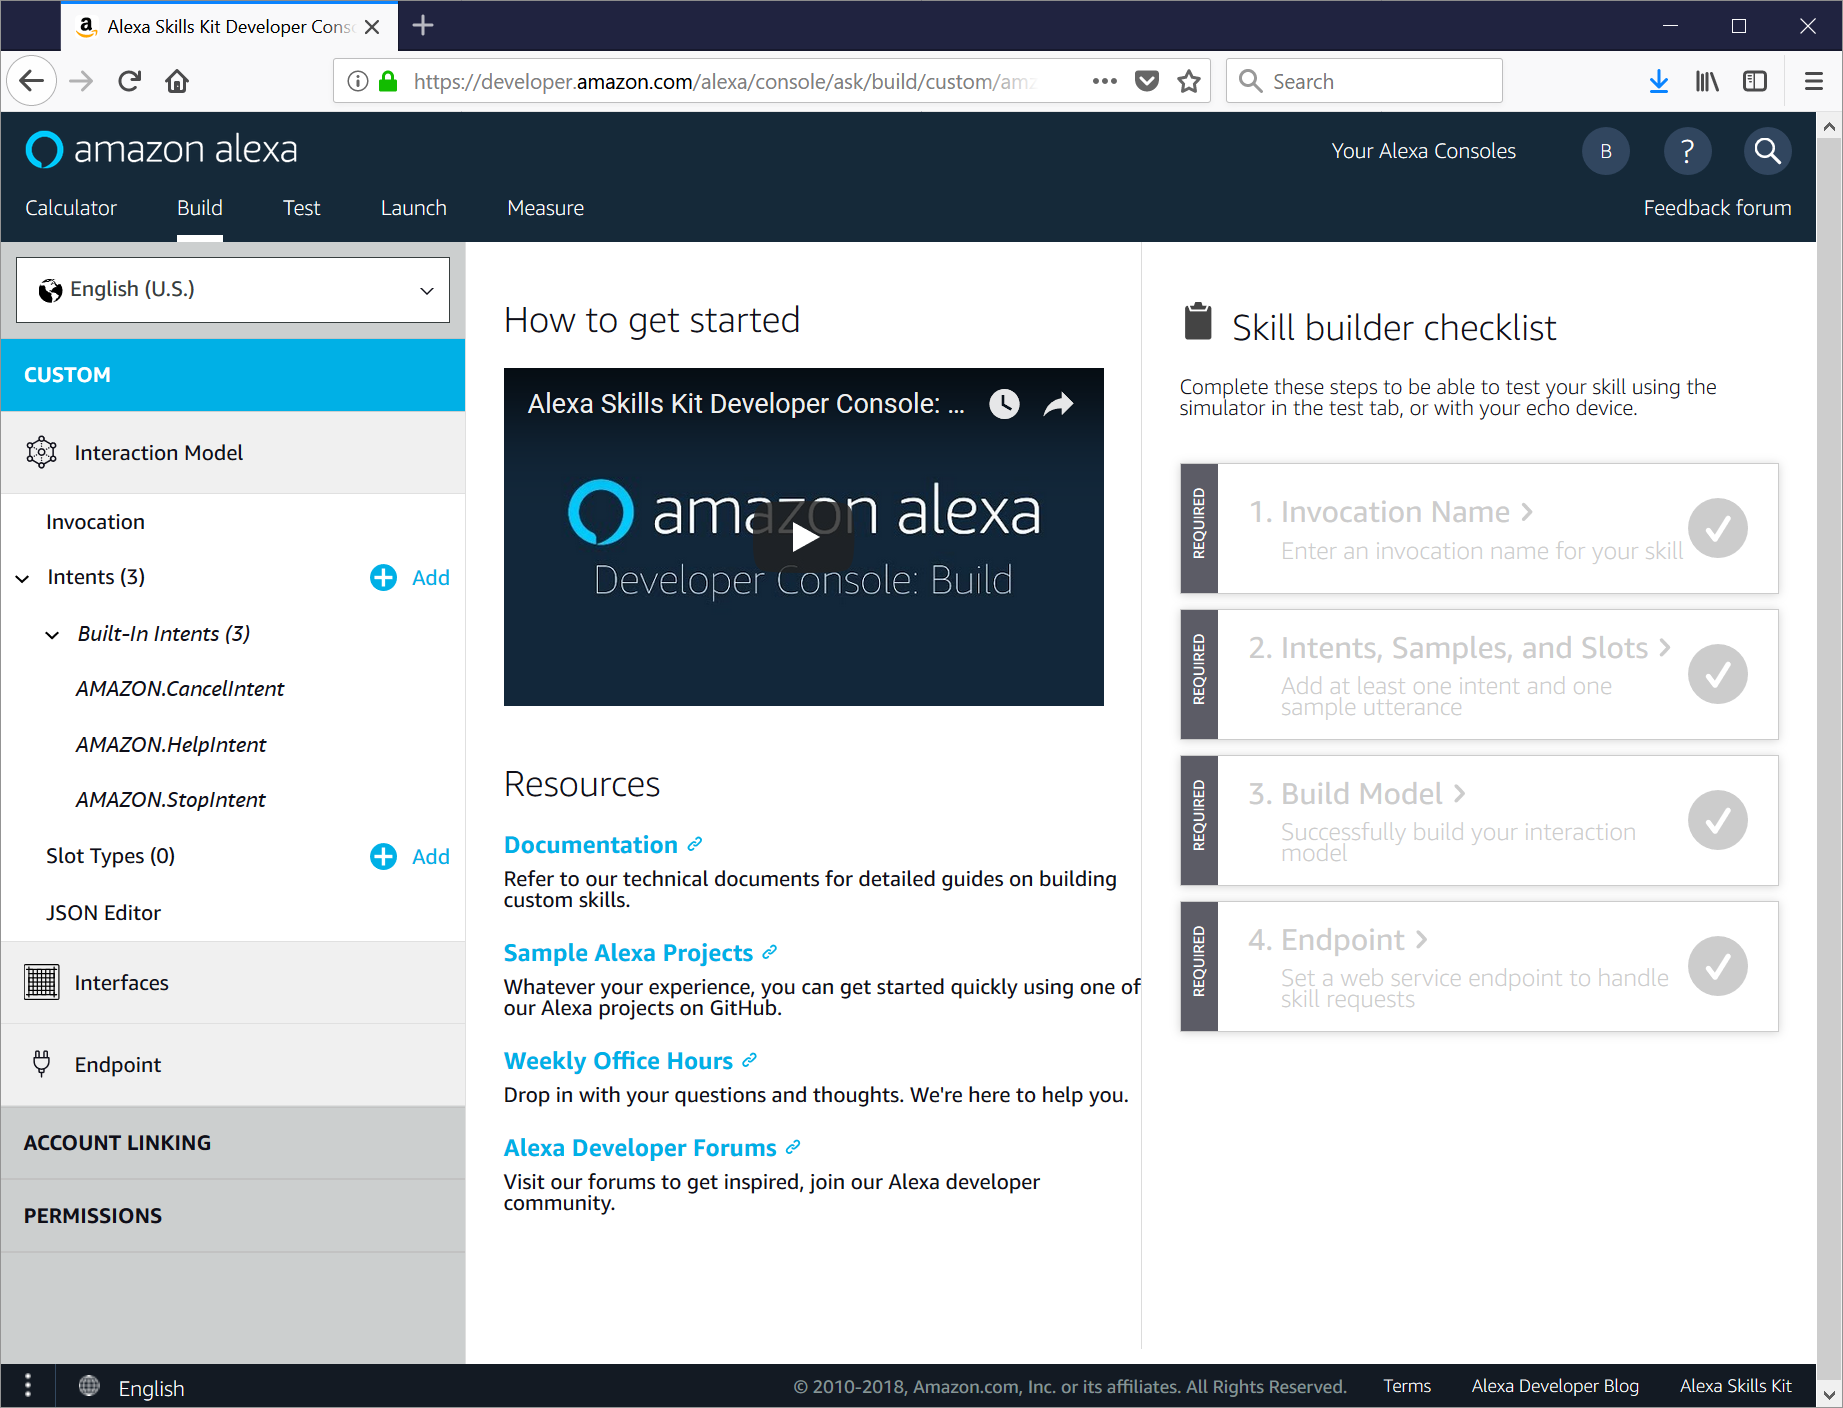
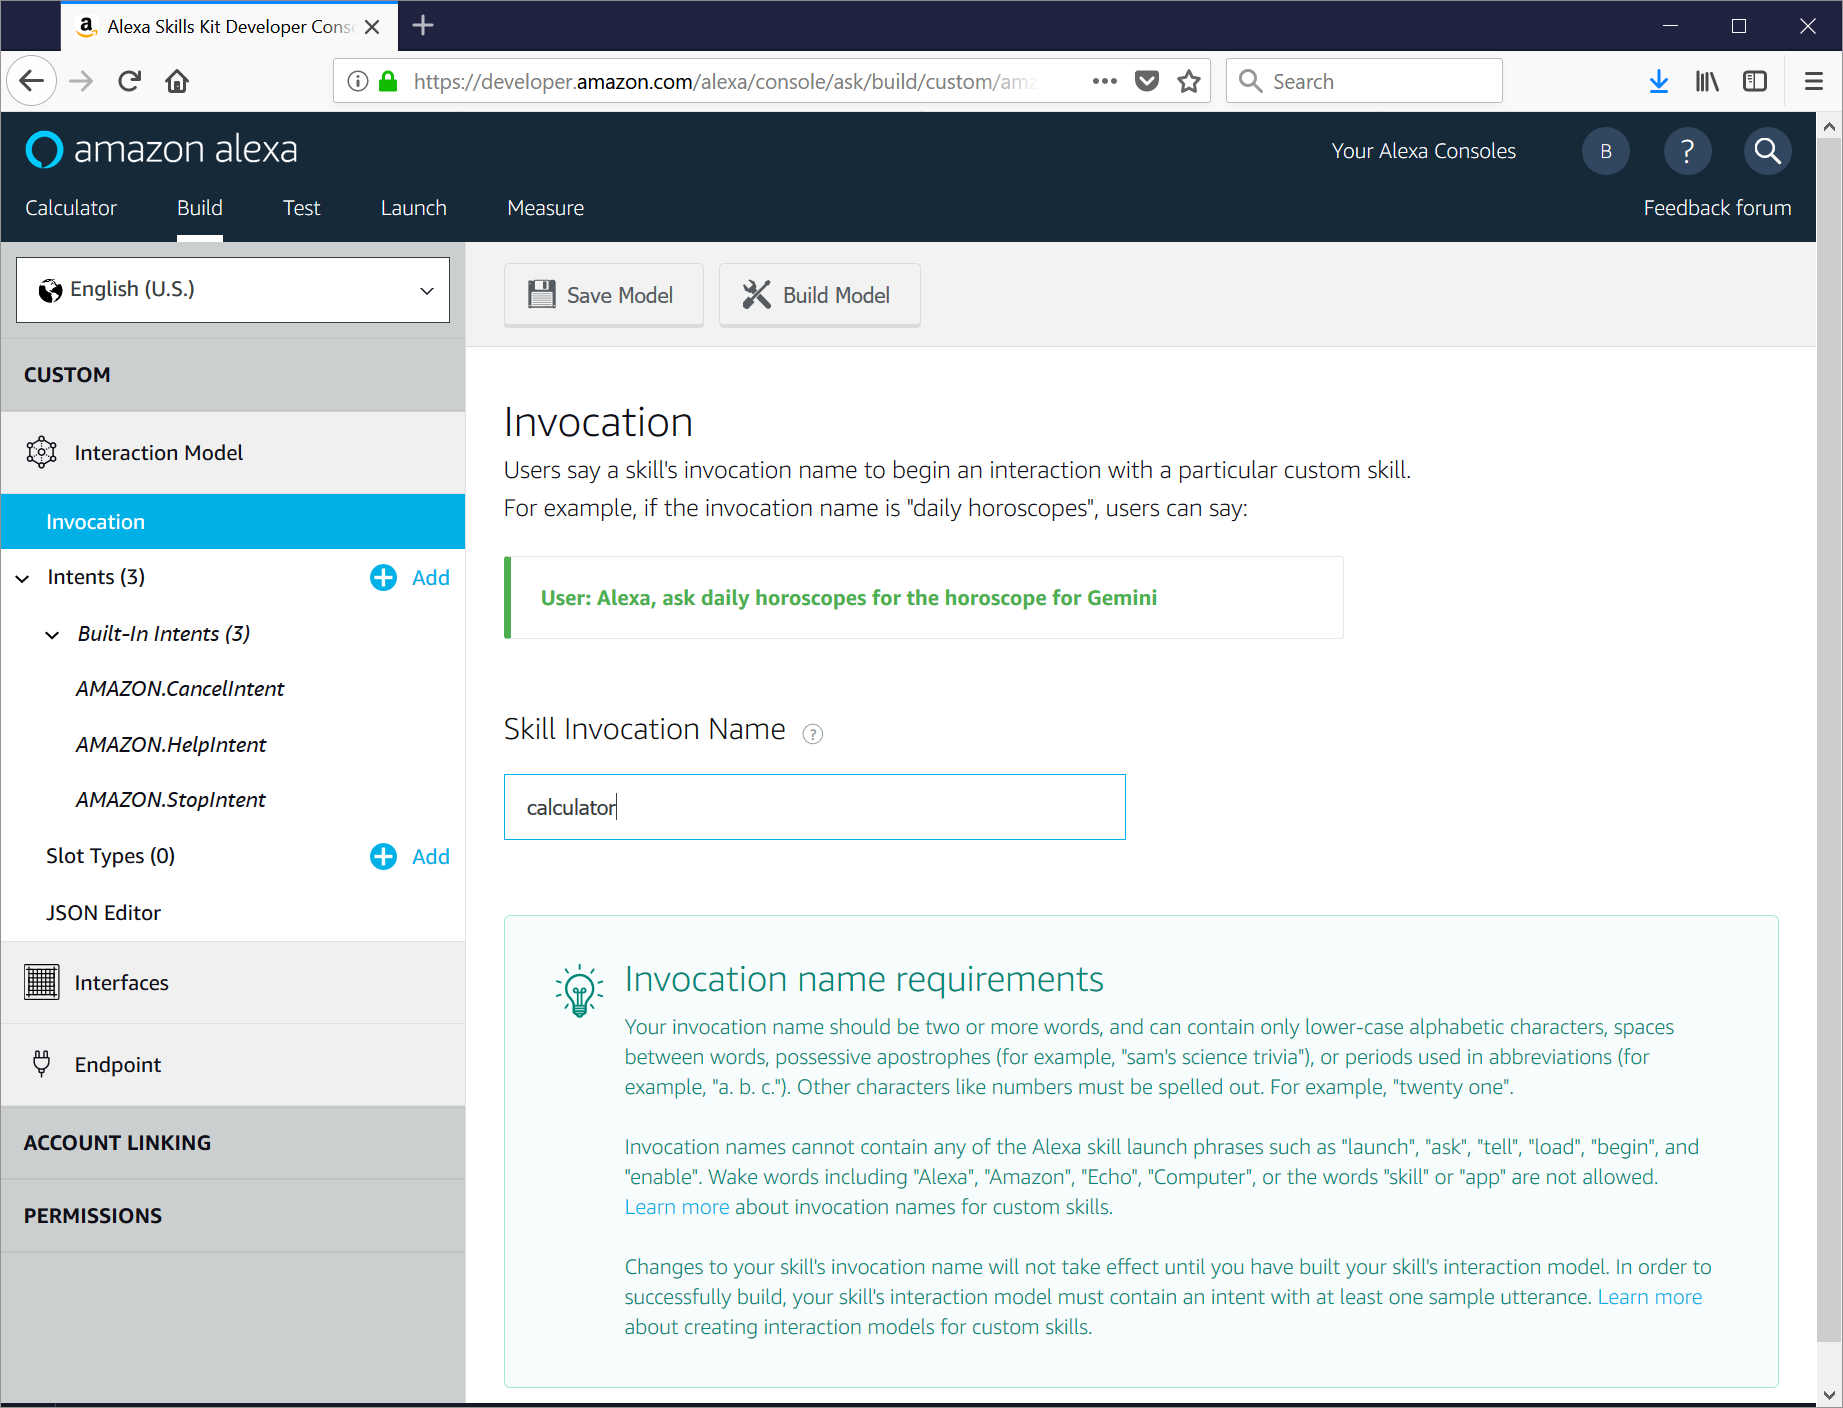
In the right Skill Builder Checklist column, click 1. Invocation Name. This is the name that users will use to trigger your skill (ex: "Alexa, ask Calculator what 3 plus 4 is"). After you enter the invocation name, click Save Model.
(Side note: At this point, I think it would be nice if they added a Next button to take you to the next step. You can either click Intents in the left-most column, or use your browsers Back button to return to the Skill Builder Checklist and choose 2. Intents, Samples, and Slots.)
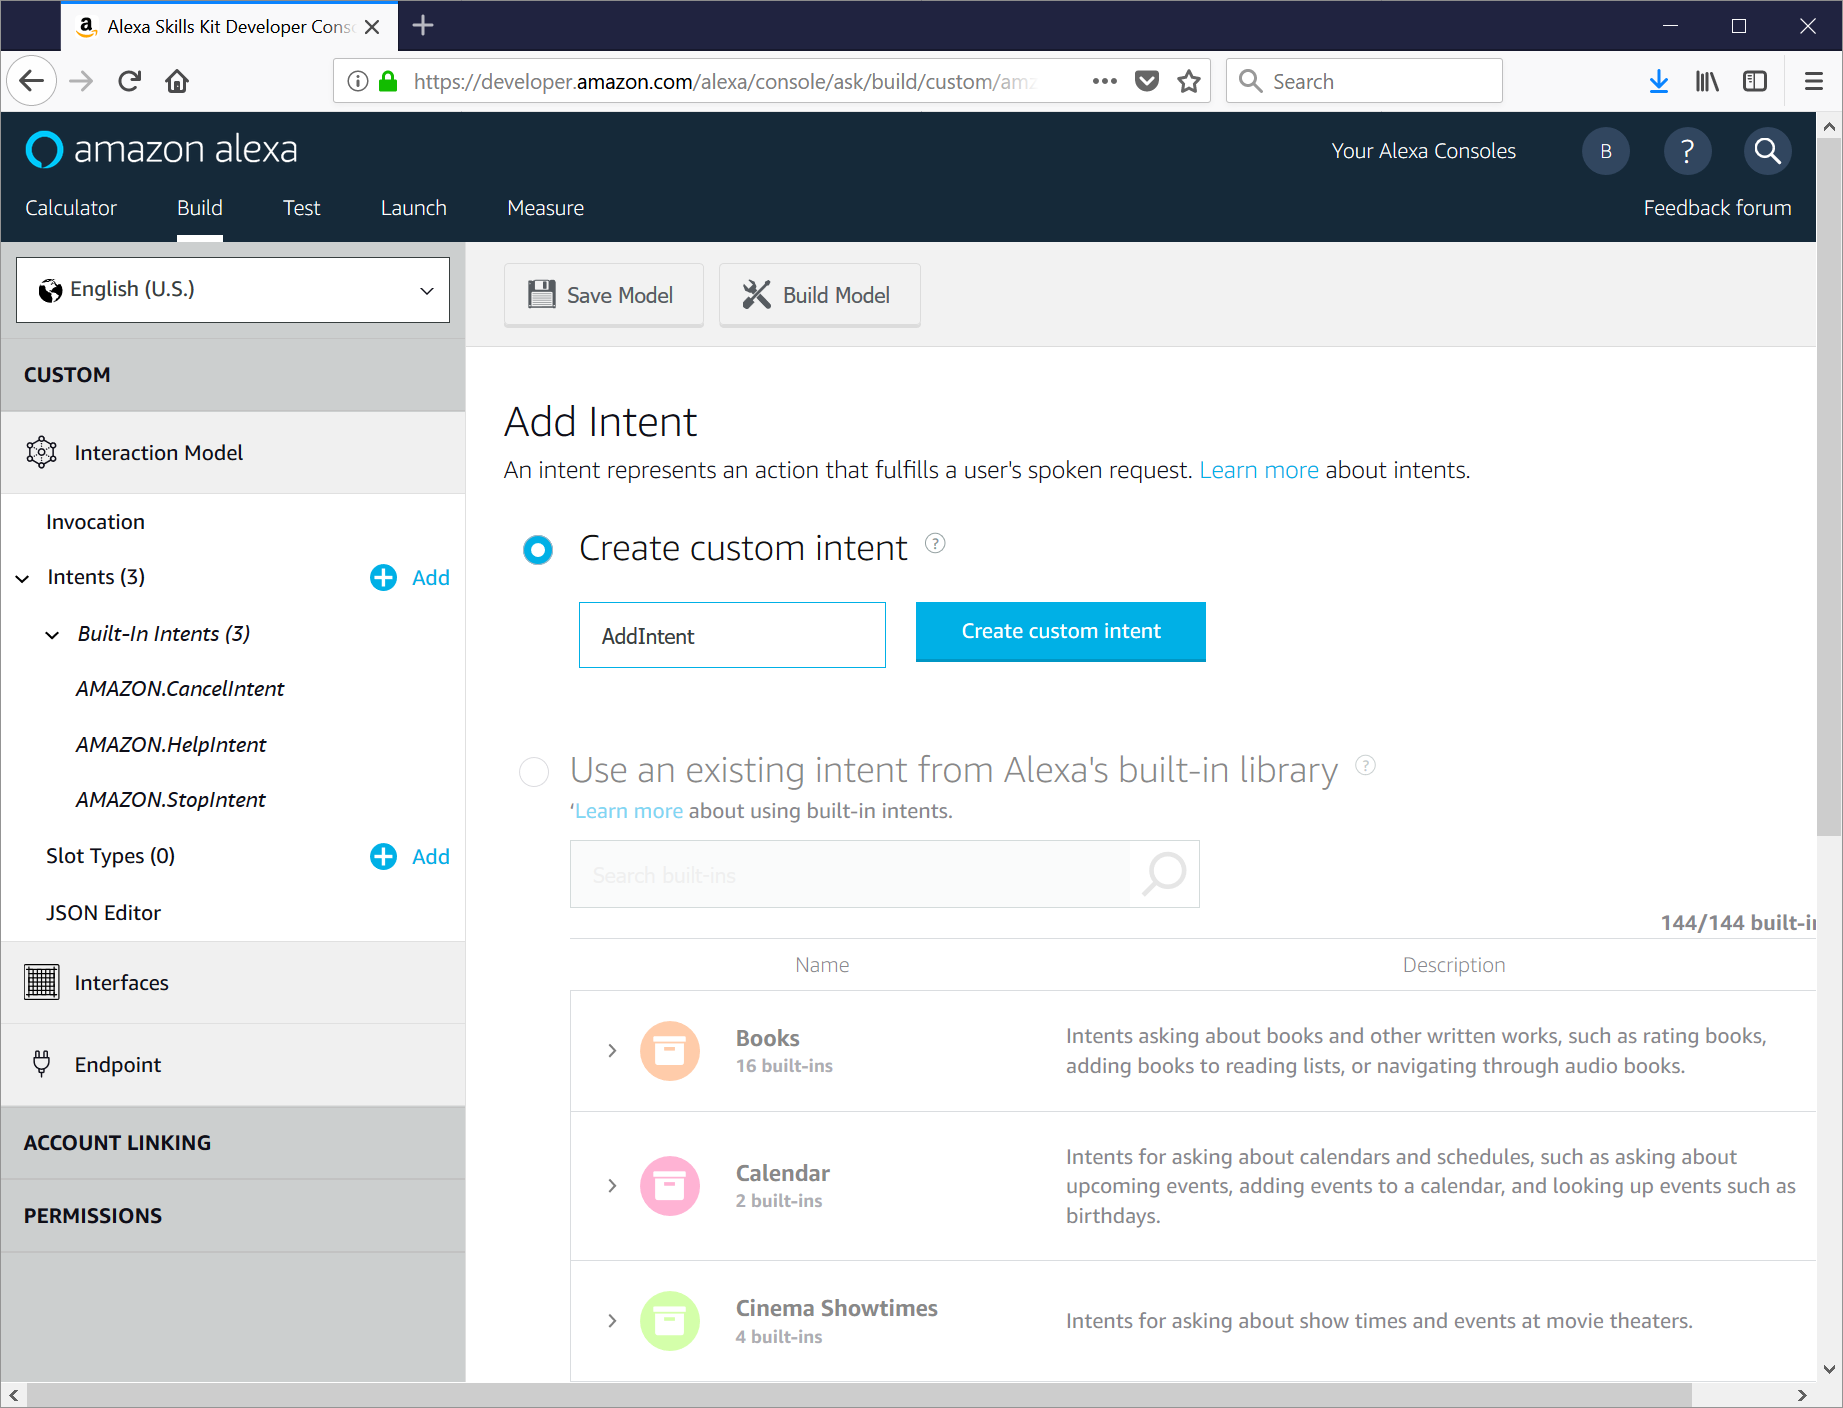
On the Add Intent page, enter the name of the first type of request that you would like to handle (for this example, we want to allow adding and subtacting, so we will start with the AddIntent).
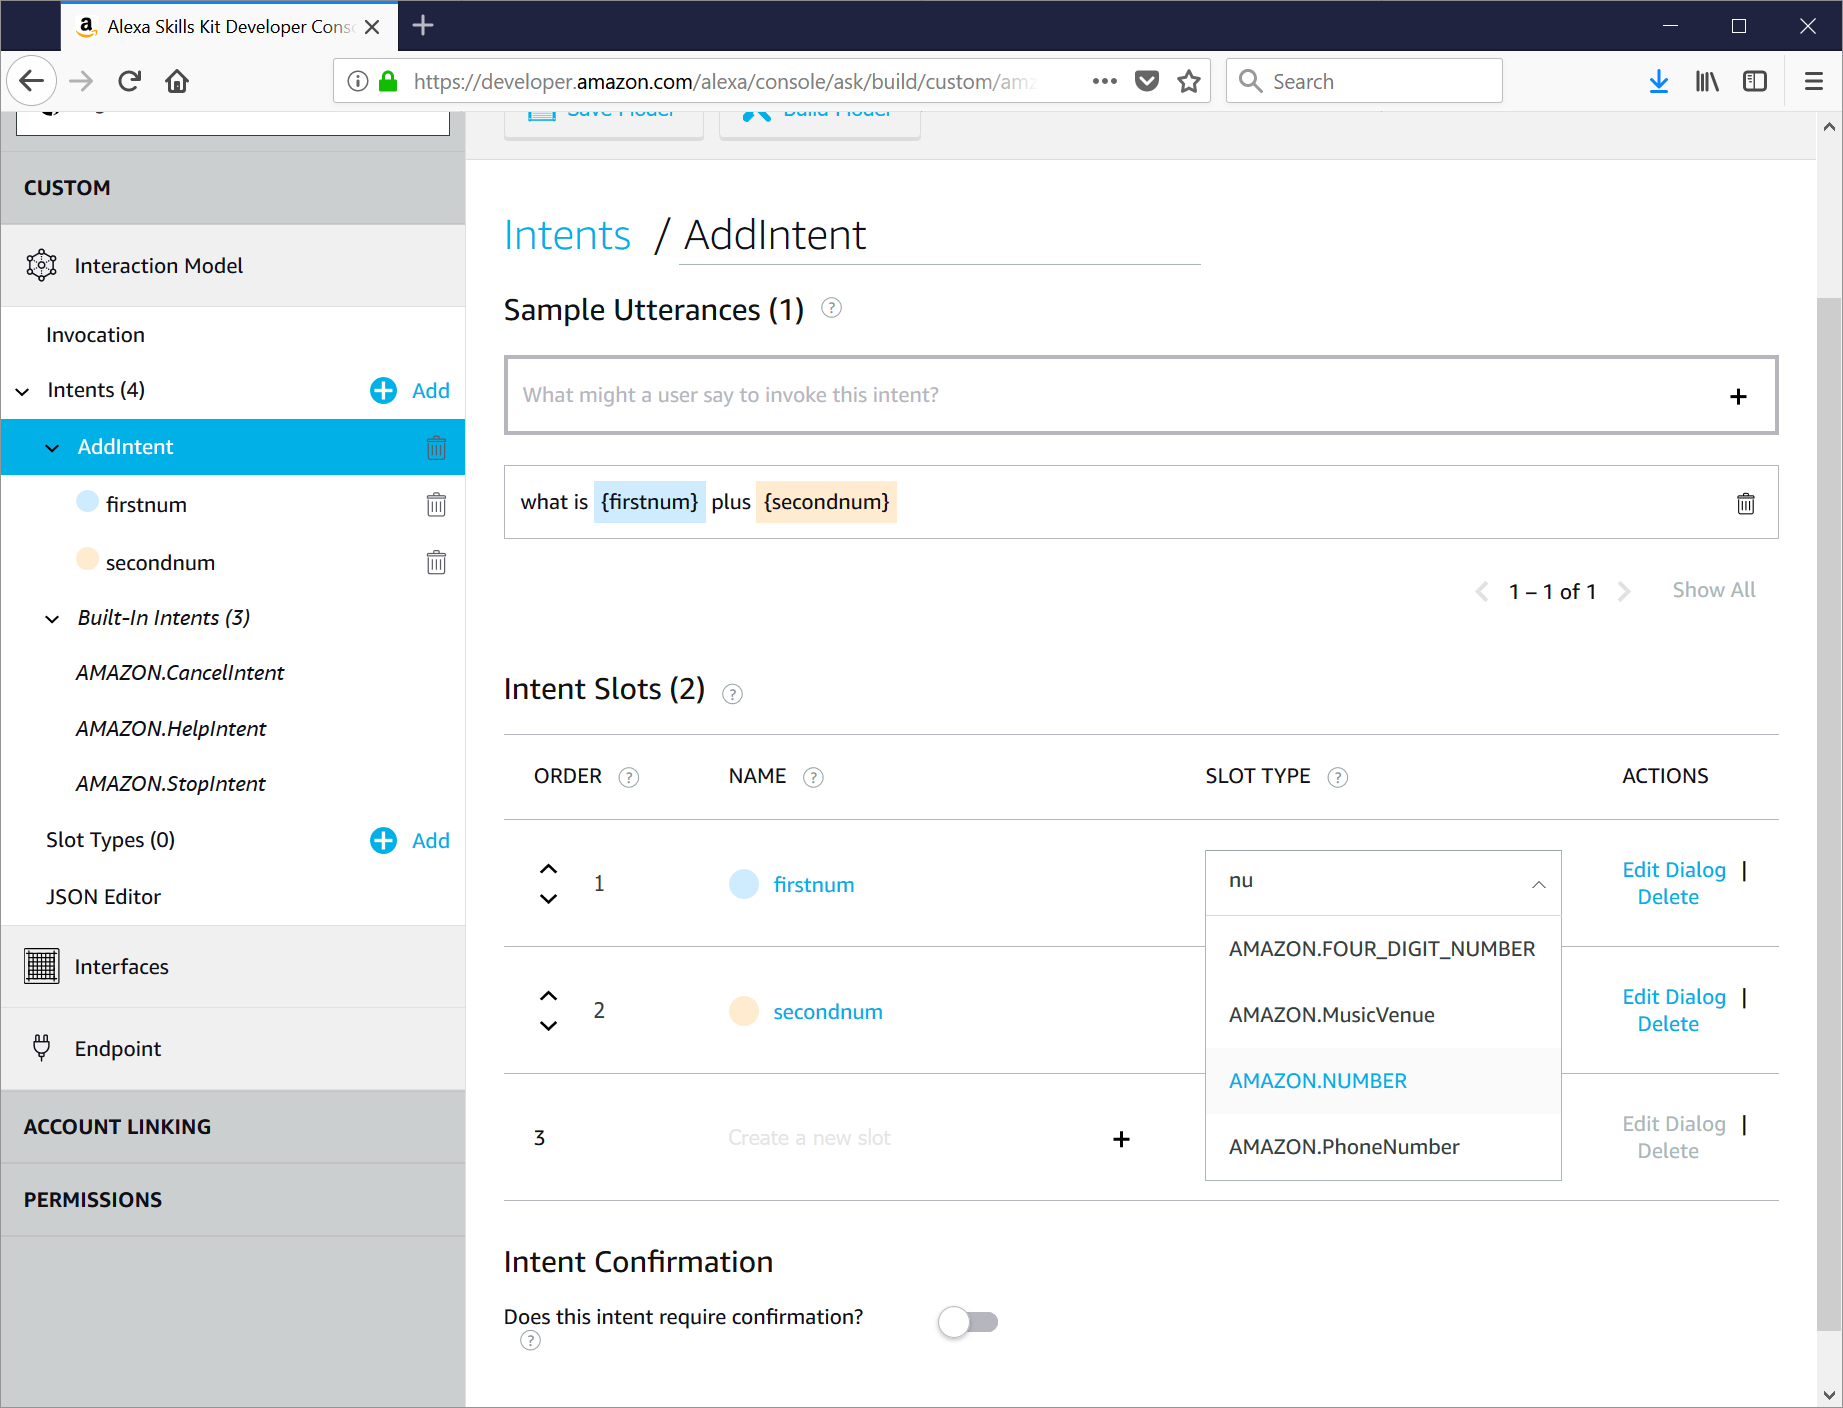
The console will update to show the Sample Utterances screen. This is where you tell Alexa what kinds of things users can say to trigger your skill. Since Alexa does the natural language parsing for you, you simply tell it which parts of the phrase are important (slots) and it will do the work of extracting those values for you. For our AddIntent, we want to allow requests like "what is 3 plus 4?" and each number is an important part, so we will set up our utterances with the appropriate slots.
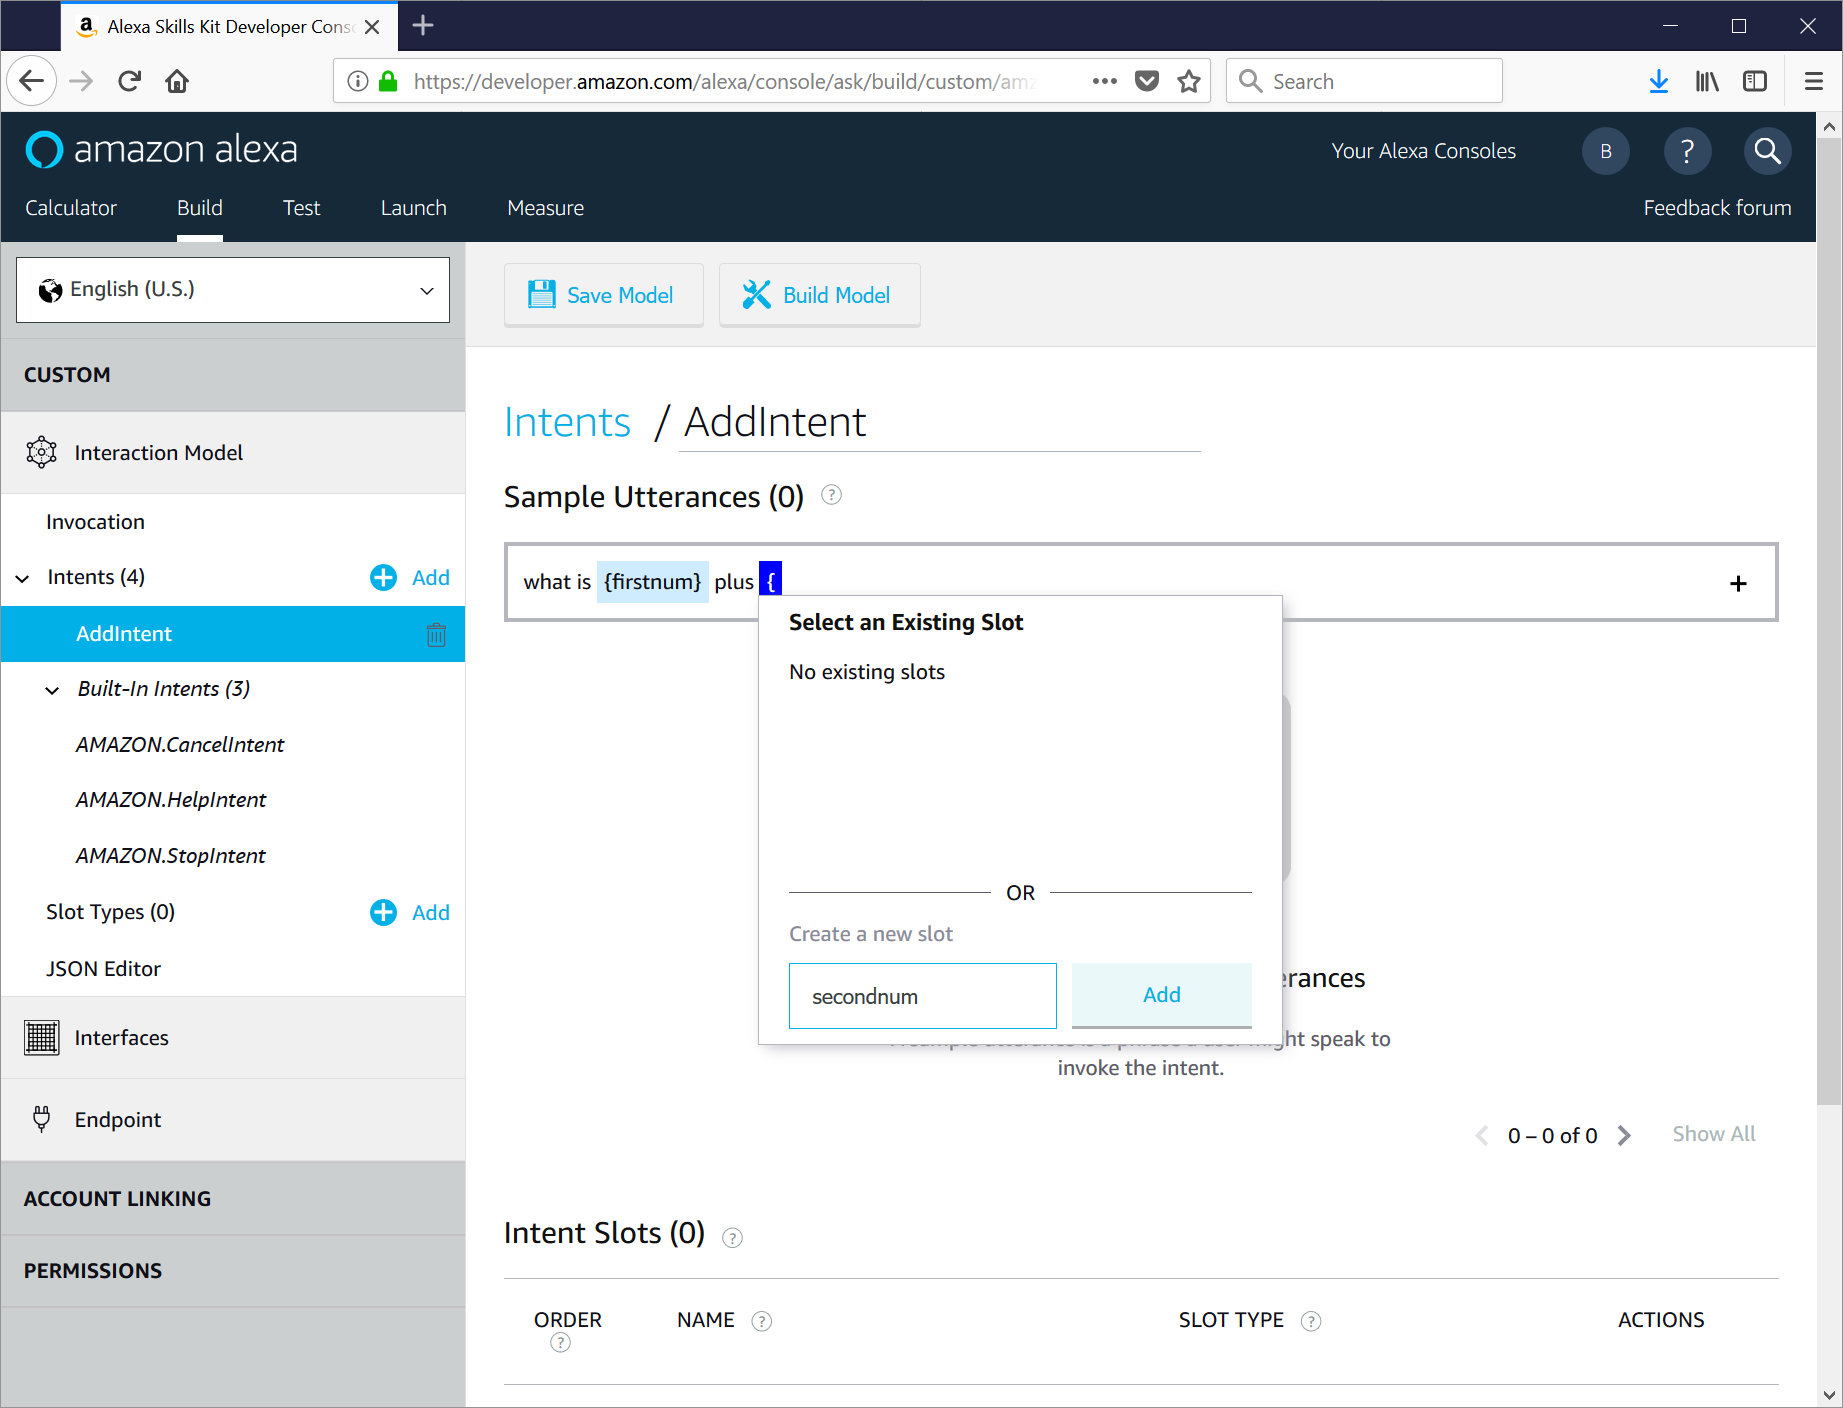
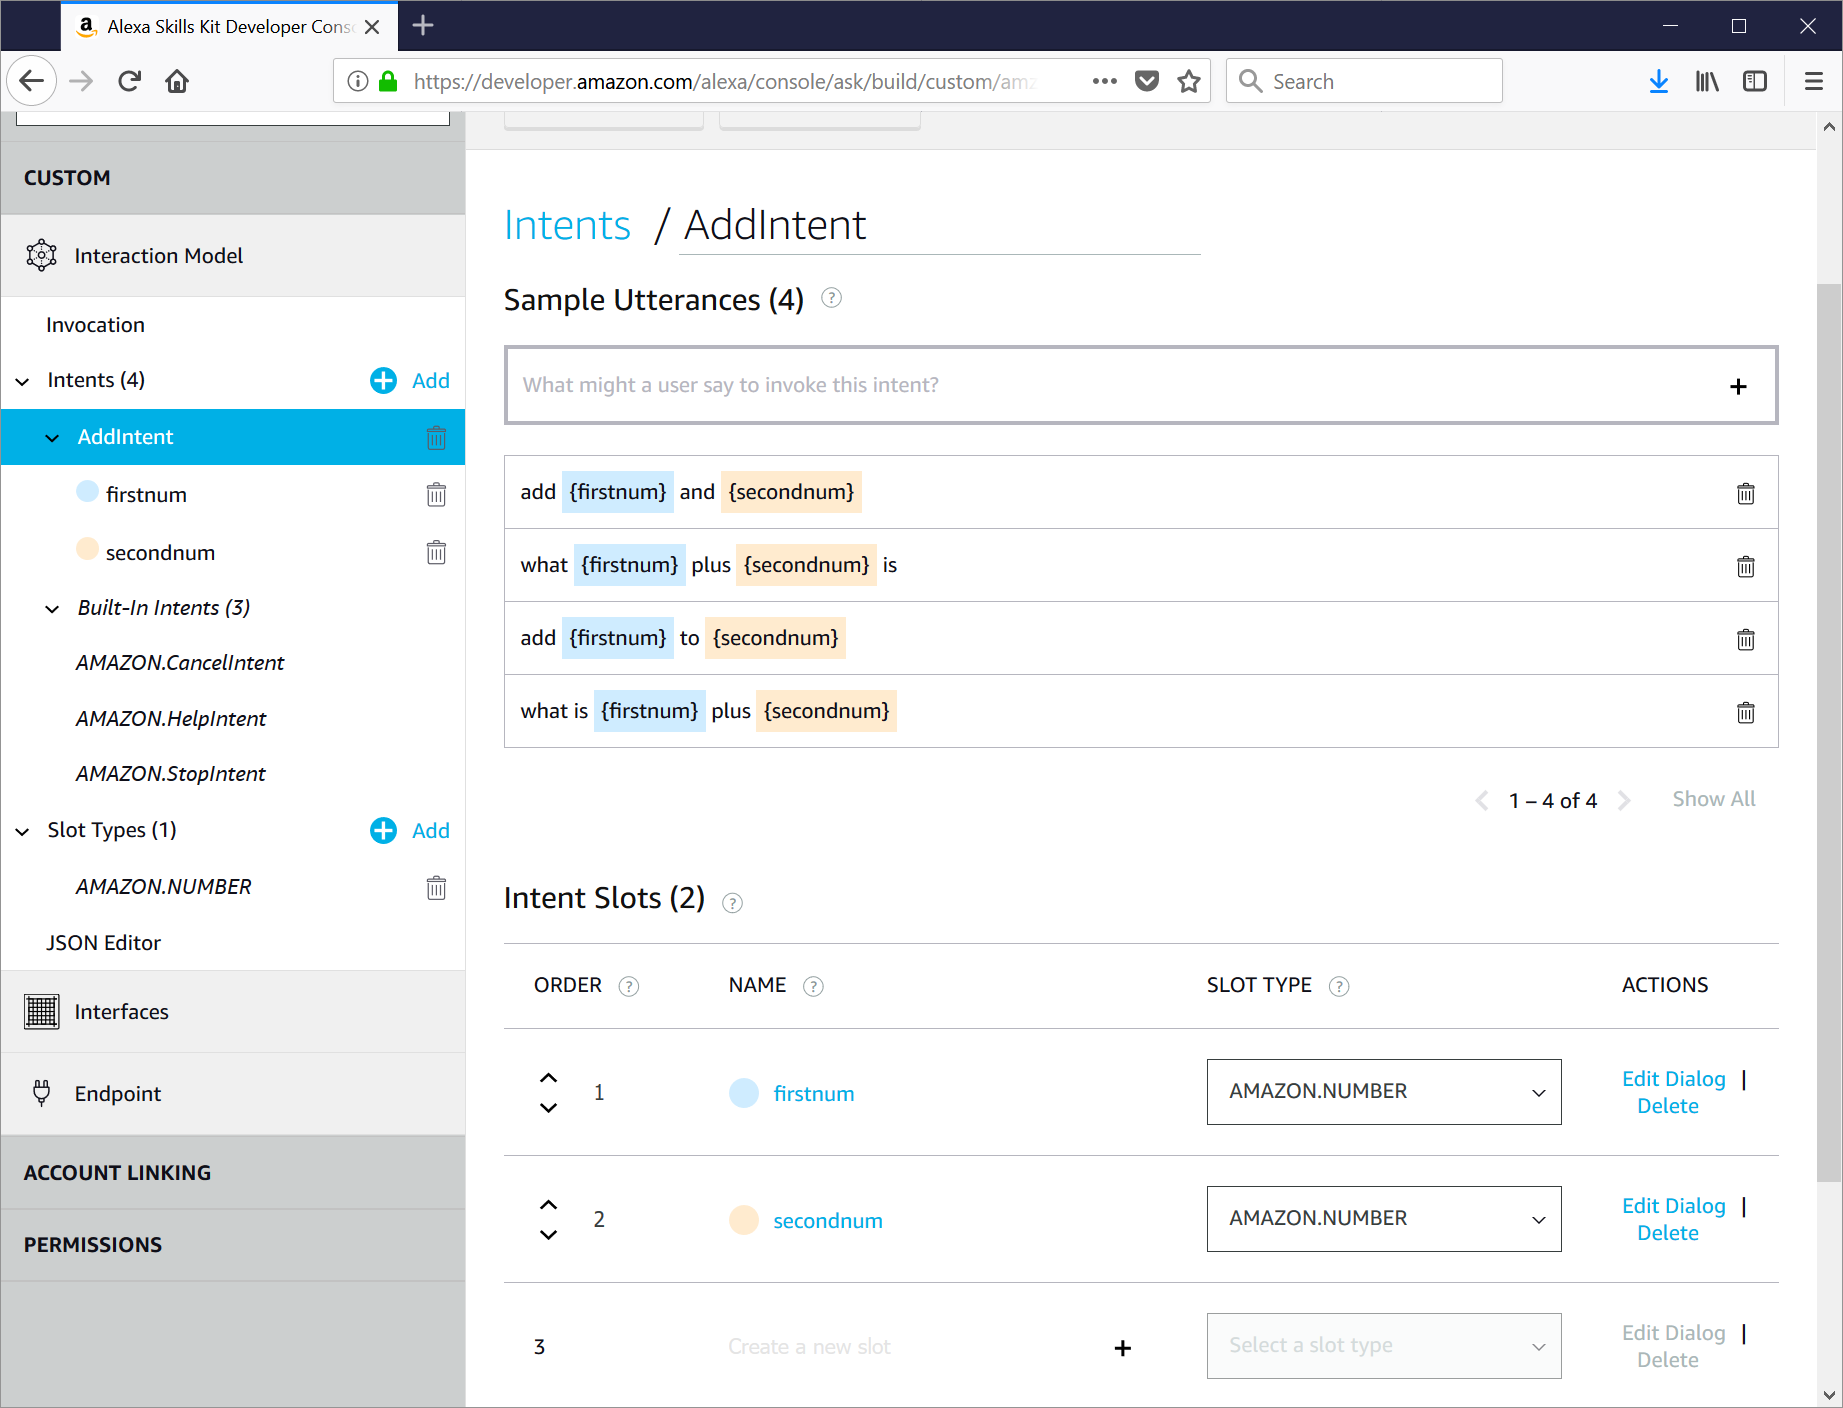
Click the + button to add the utterance, and the console will update. You will notice that your custom slots are now listed below, so be sure to set the Slot Type to the correct value (since we are dealing with numbers, we will choose AMAZON.NUMBER).
Add additional variations of the utterance as appropriate.
Here is a tip: Make sure to support direct requests (ex: "what is 3 plus 4?", but also support case where the user invokes the skill and triggers the action in a single request (ex: "Alexa, ask Calculator what 3 plus 4 is"). Notice the slightly different grammar for each.)
Repeat the process for the SubtractIntent:
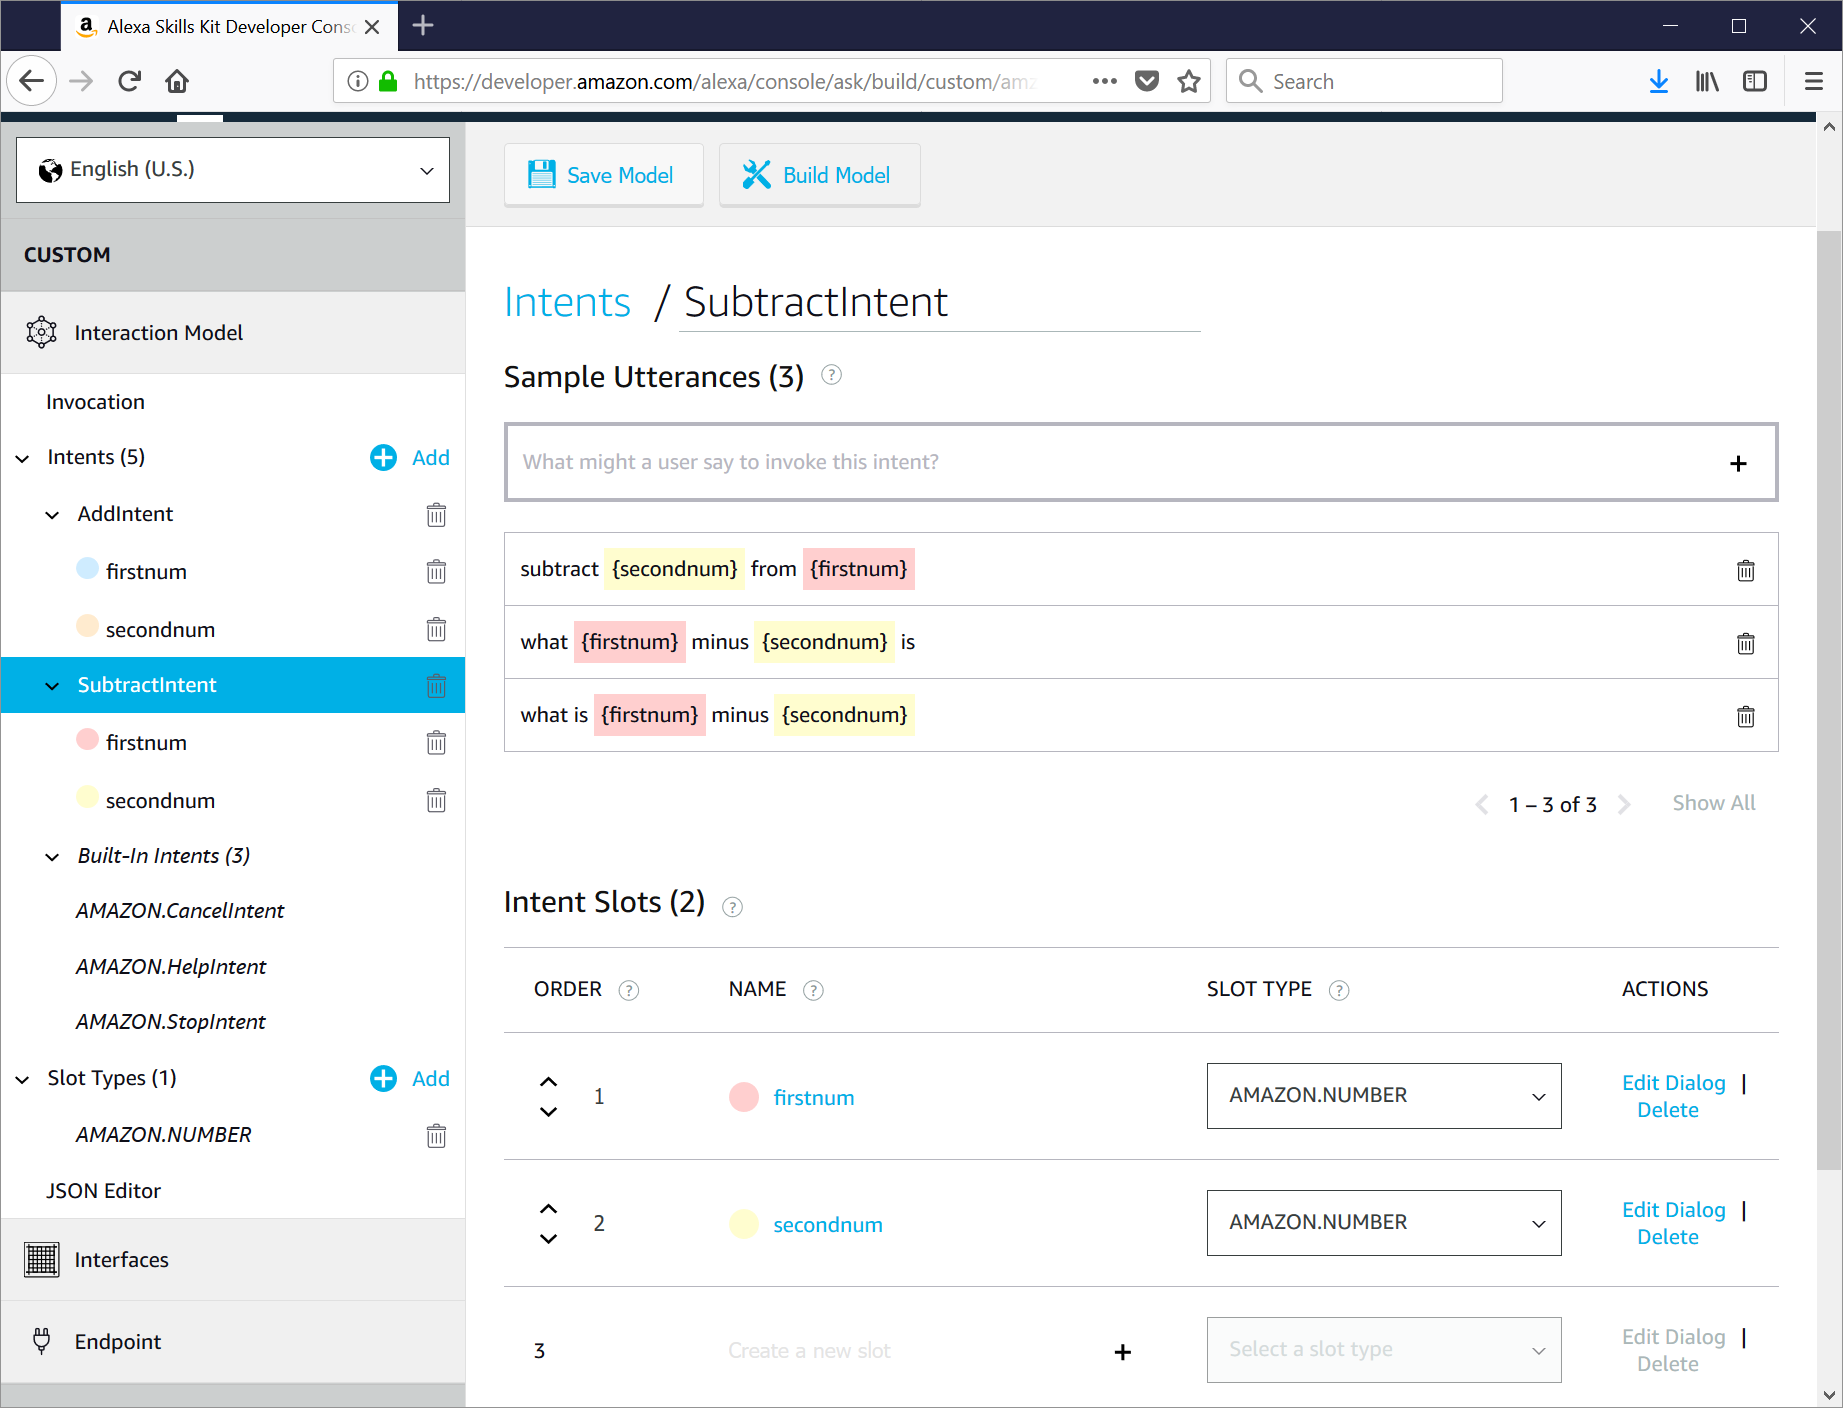
Be sure to click Save Model to save your changes. After your changes are saved, go ahead and click Build Model as well to have Alexa prepare your skill to be used.
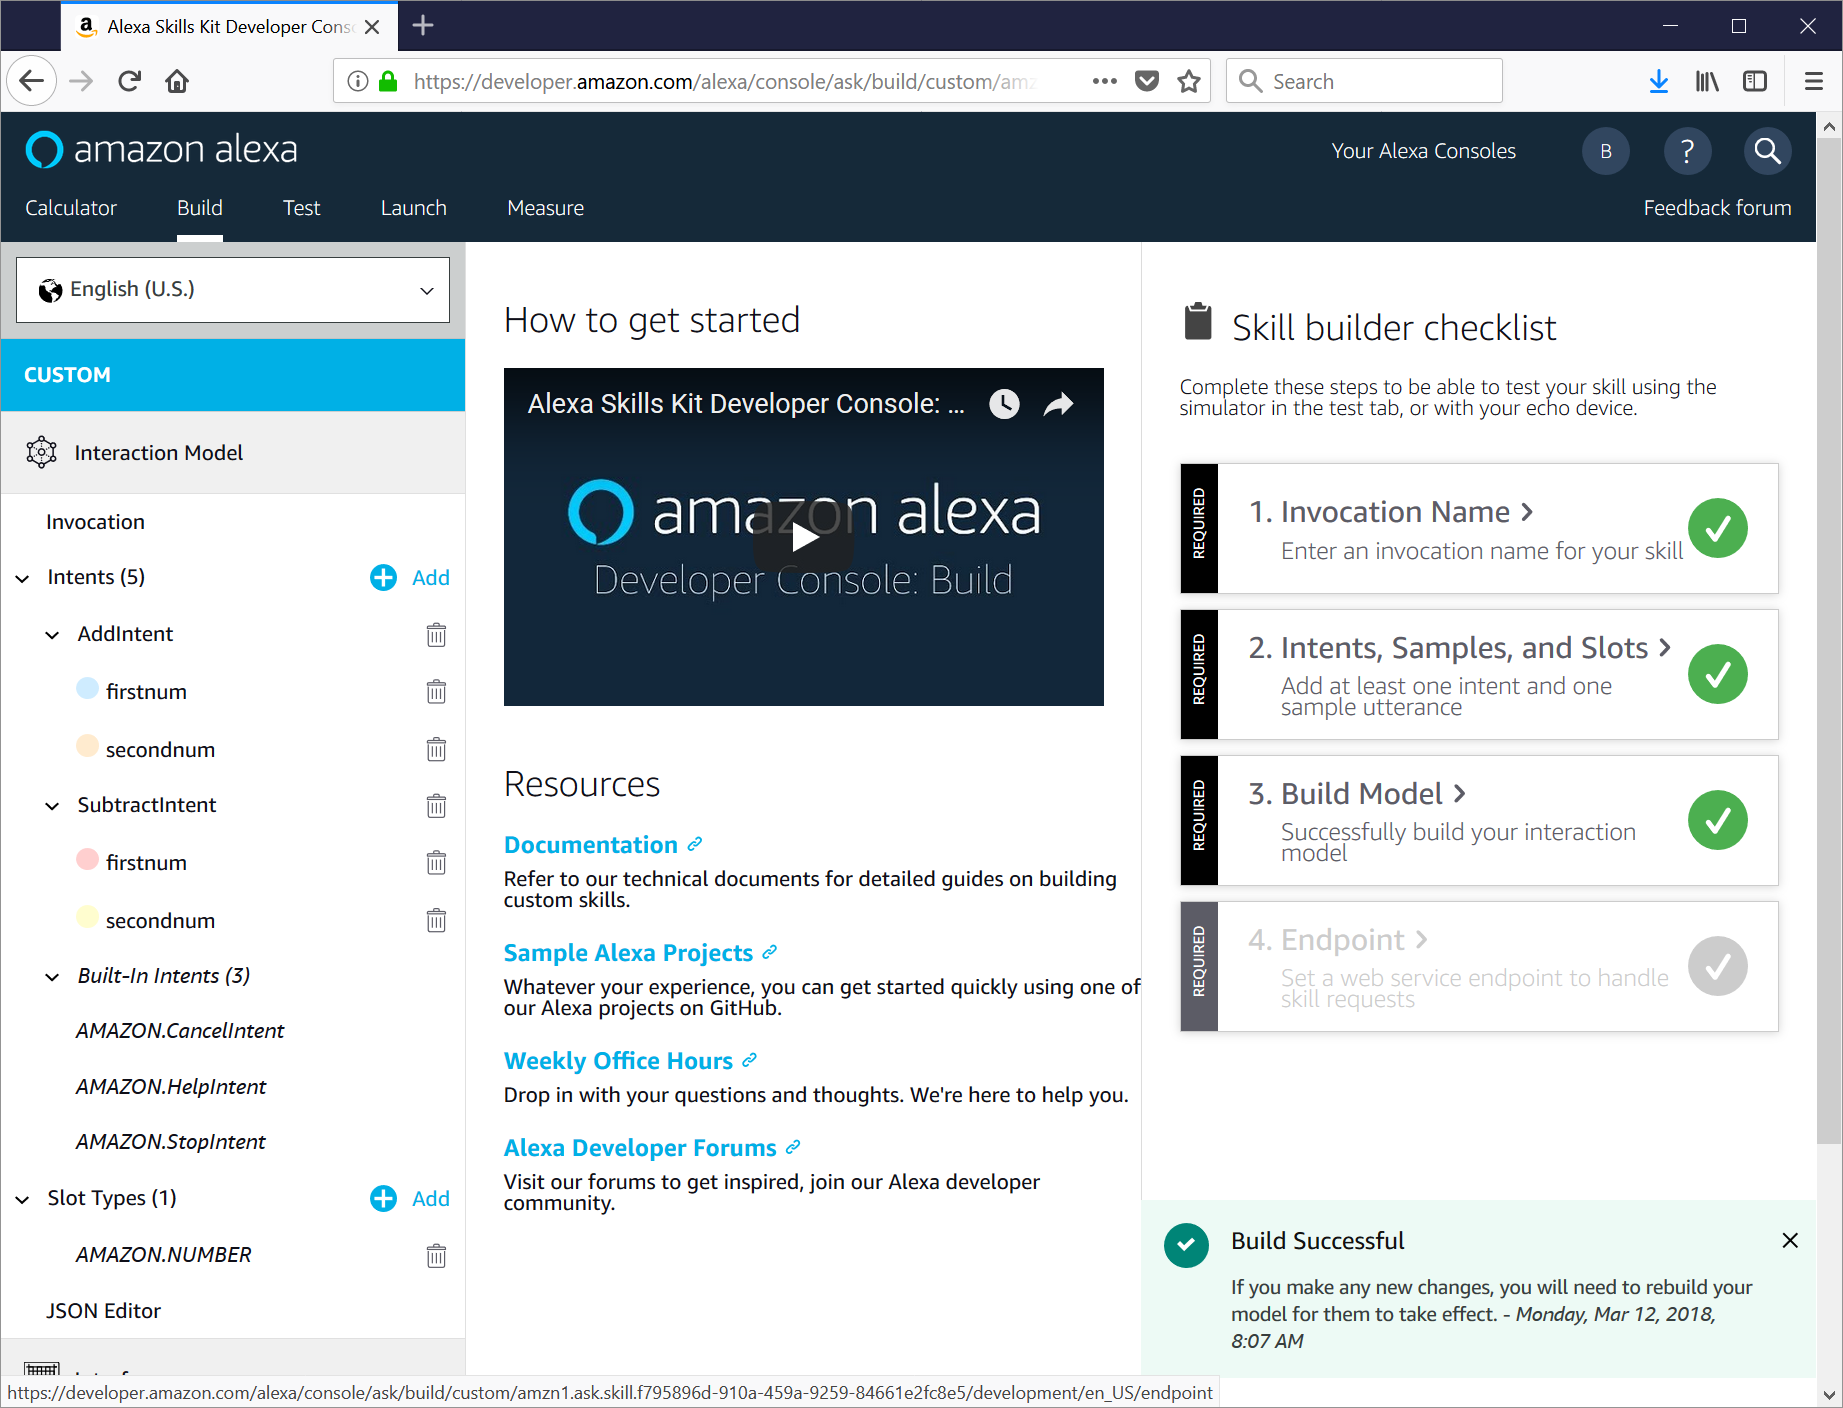
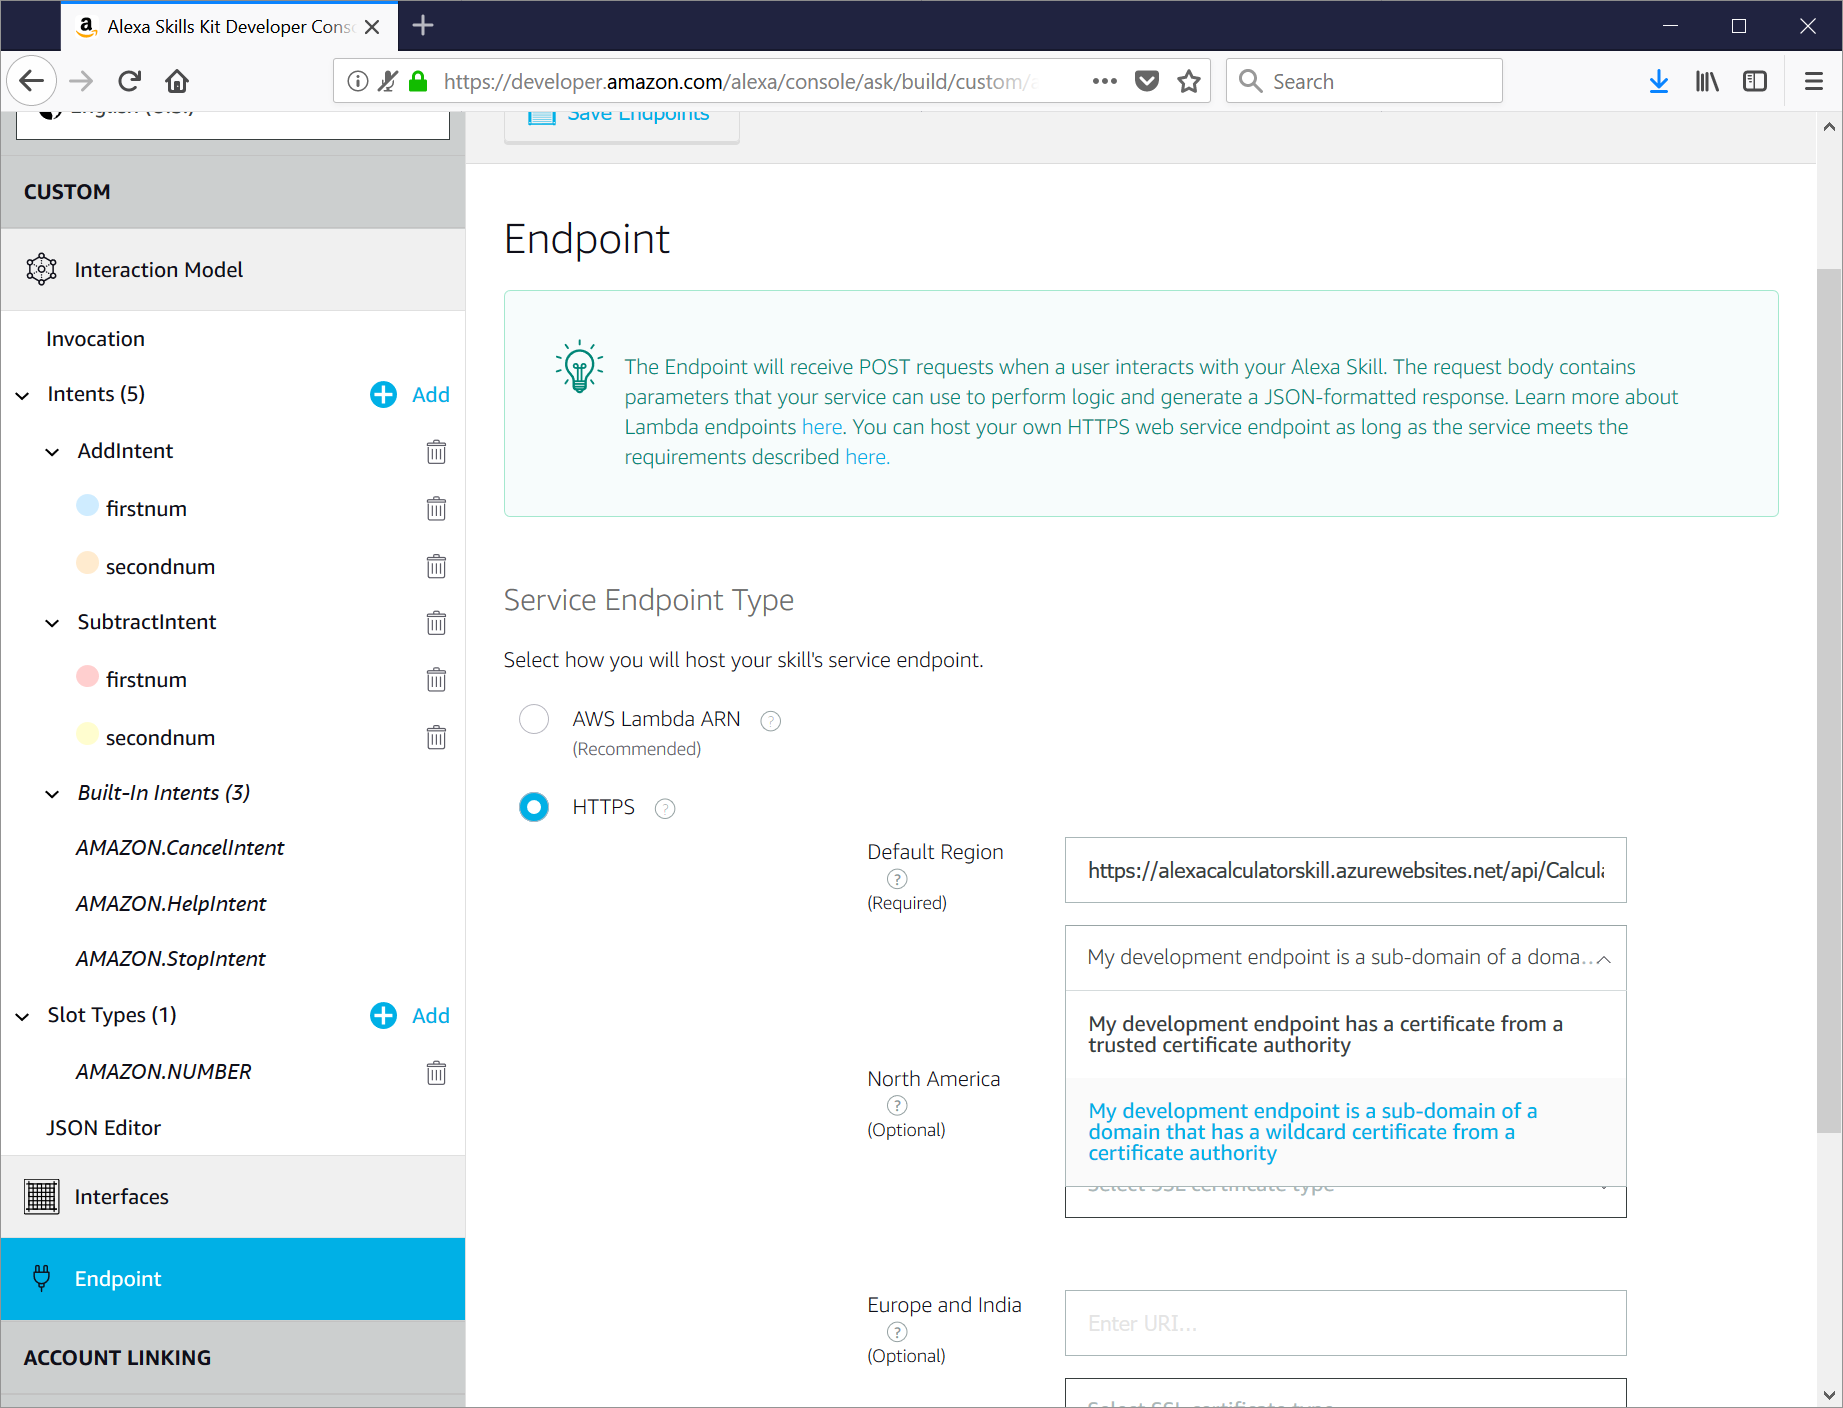
The last step is to tell Alexa to use your Azure Function. Click on 4. Endpoint to go to the Endpoint screen. There are two choices: use an AWS Lambda, or use a custom HTTPS endpoint. Click HTTPS and enter your Azure Function url. Since your function is hosted as a subdomain of azurewebsites.net, but sure to change the dropdown to My development endpoint is a sub-domain of a domain that has a wildcard certificate from a certificate authority. and then click Save Endpoints.
Try it out
Now your skill is completely configured and ready to test end-to-end. Click the Test tab and enable testing. You can type or speak your request and on the right side, you can:
- see the JSON request that Alexa sent to your skill
- see the JSON response that your skill responded with
- hear Alexa's audio response
- see what would have been displayed on Echo devices with a screen (like the Echo Show)
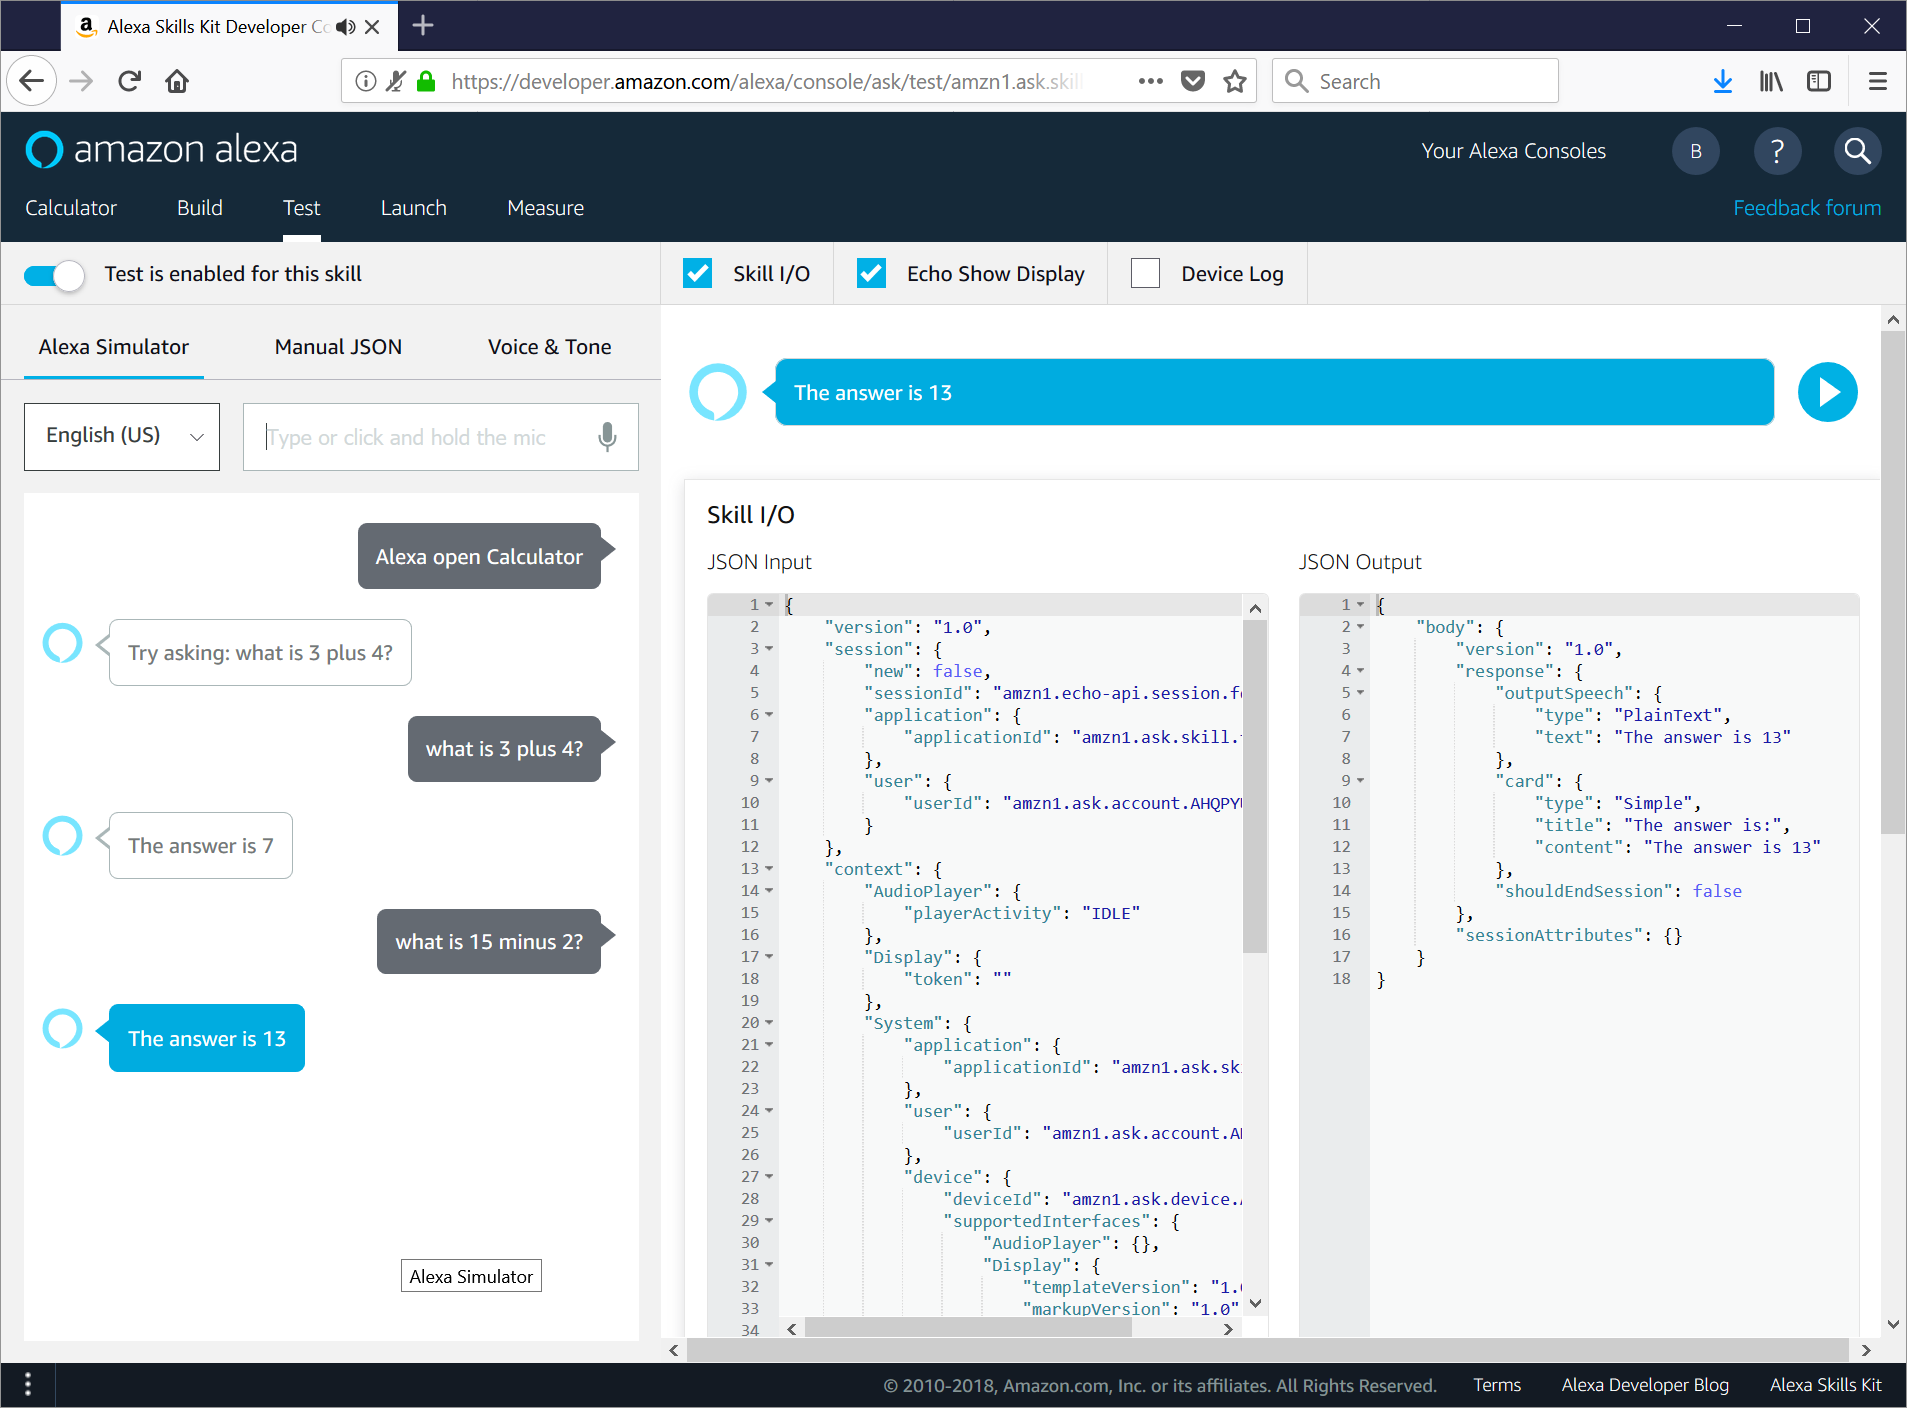
That is it! Your skill is up and running and successfully talking to your Azure Function.
If you are a a developer with an Alexa device and you have not played around with writing a skill for it yet - what are you waiting for?
(And fret not: a future post will show how to write a Cortana Skill backed by an AWS Lambda function just in case you prefer jelly and peanut butter instead of peanut butter and jelly).